
AI时代人人必备的 Claude 实战技能 —— 新手入门:创建第一个 Claude 技能
本文围绕产品设计师如何快速上手 Claude 技能构建展开,系统讲解从基础认知、环境准备到创建第一个 Claude 技能的完整流程。内容涵盖技能结构设计、提示词编写逻辑、工具调用思路及实战案例演示,帮助新手理解如何将需求转化为可执行的 AI 能力模块,实现从“会用 AI”到“会构建 AI 能力”的进阶跃迁。

作者:黎跃春(V:liyc1215),智能体来了(集团)创始人,高校研究生兼职教授,河北省十五五规划《人工智能通识与实践》教材编委,《AI智能体通识与实践》系列丛书主编、副主编,前中国石油集团北京中油瑞飞研究院架构师,中关村创新创业2019U30雏鹰人才,中国石油、国家电网、中国电信、河北出版传媒集团、中科院自动化所等等国央企及几十家上市公司,上百所高校AI智能体内训讲师。

产品设计的本质在于流程。
你的工作流组织得越清晰、越系统化,最终产出的结果就越可预测、越稳定。
Claude Skills 是一个强大的工具,它可以将那些重复性的思考与分析过程,转化为可复用、可沉淀、可持续调用的工作流,让你的影响力不再局限于一次性的提示词(prompt),而是实现规模化放大。
在本文中,我将演示产品设计师如何利用 Claude Skills 自动化并标准化常见的工作流程,例如在用户研究过程中,对用户访谈记录(transcripts)进行系统化分析。
你将学习如何搭建 Claude Code 环境,创建你的第一个 Skill,对其输出结果进行优化,并在真实的用户研究数据上进行测试。
无需工程背景,只需对 Terminal(终端) 有基本的使用熟悉度,以及对自己想要达成的目标结果有清晰的认知即可。
一、开始使用 Claude:环境准备
你可以通过多种方式访问 Claude,但在本文中,我选择使用 Claude Code 环境。
整个环境的配置仅包含两个步骤,几分钟内即可完成:
步骤一:将 Claude Code 安装到你的本地环境中
首先,我需要在自己的电脑上安装 Claude Code 的命令行环境(shell)。
我使用的是 macOS 系统,因此会打开 Terminal(终端),并输入以下命令:
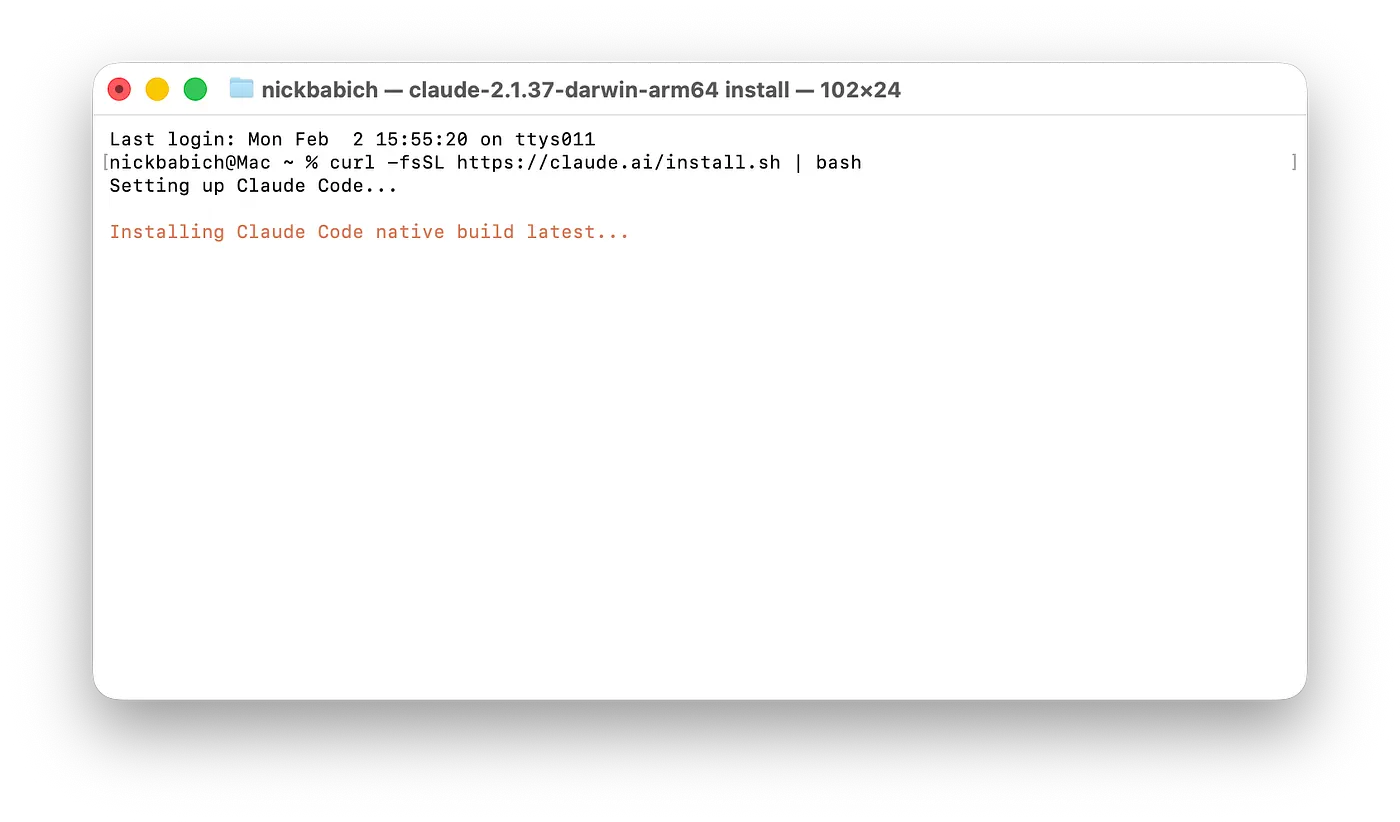
方式 A:curl(容易报错)
curl -fsSL https://claude.ai/install.sh | bash
安装过程需要一些时间,所以如果终端窗口里没有进展,不要慌张。
方式 B:Homebrew(相对省心)
很多安装指南都提供了 brew cask 方式:
brew install --cask claude-code
claude --version
方式 C:npm(如果你本来就有 Node.js 18+,最省心,我的安装方式是C)
Anthropic 文档也给了 npm 安装:
npm install -g @anthropic-ai/claude-code
claude --version
注意:不要用
sudo npm install -g(容易权限坑)。
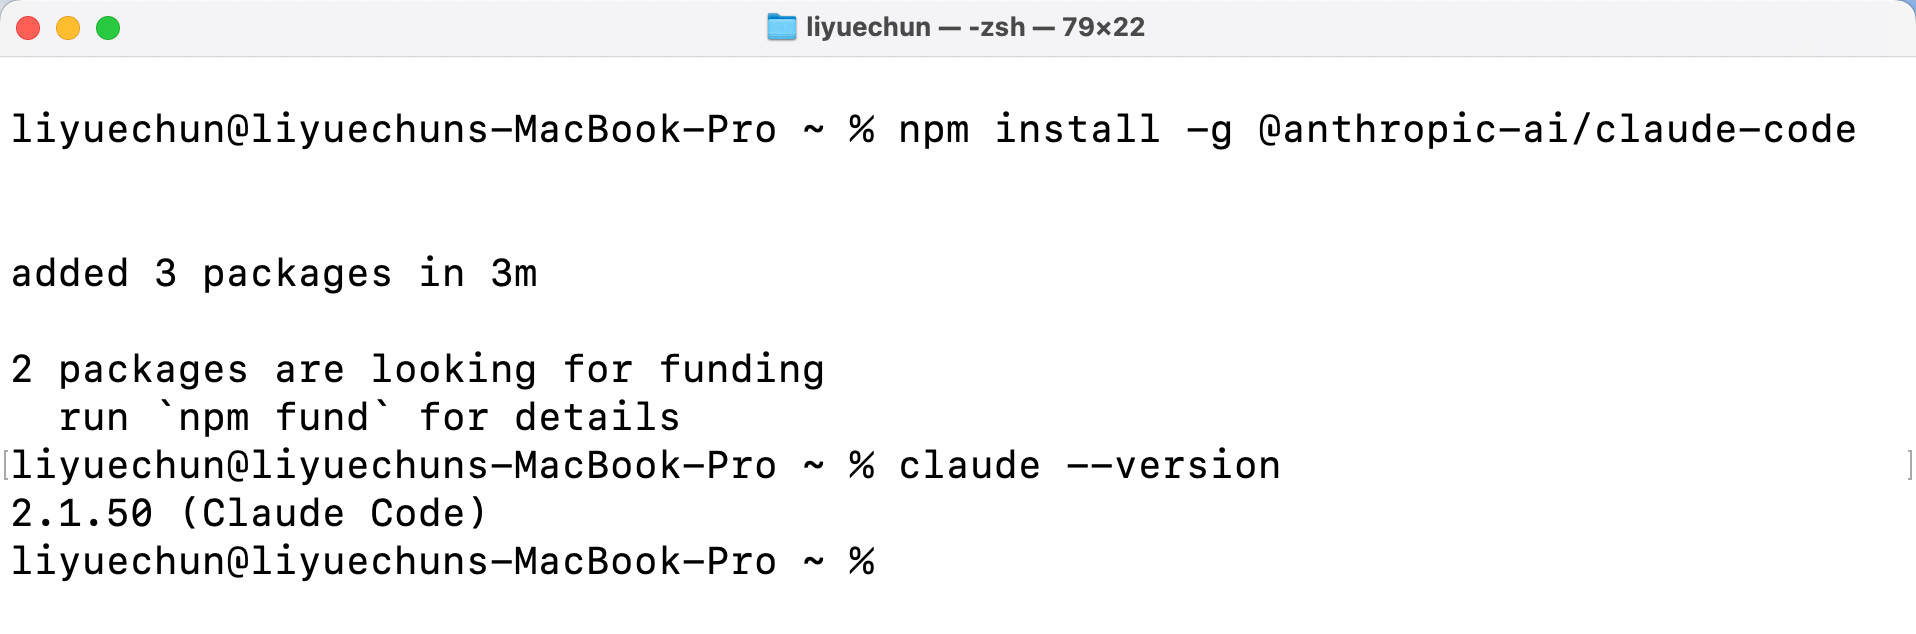
liyuechun@liyuechuns-MacBook-Pro ~ % npm install -g @anthropic-ai/claude-code


added 3 packages in 3m

2 packages are looking for funding
  run `npm fund` for details
liyuechun@liyuechuns-MacBook-Pro ~ % claude --version
2.1.50 (Claude Code)
我的安装方式是方式C:接下来我们执行如下指令:
liyuechun@liyuechuns-MacBook-Pro ~ % claude --help
说明大功告成:
liyuechun@liyuechuns-MacBook-Pro ~ % claude --help
Usage: claude [options] [command] [prompt]

Claude Code - starts an interactive session by default, use -p/--print for non-interactive output

Arguments:
  prompt                                            Your prompt

Options:
  --add-dir <directories...>                        Additional directories to allow tool access to
  --agent <agent>                                   Agent for the current session. Overrides the 'agent' setting.
  --agents <json>                                   JSON object defining custom agents (e.g. '{"reviewer": {"description": "Reviews code",
                                                    "prompt": "You are a code reviewer"}}')
  --allow-dangerously-skip-permissions              Enable bypassing all permission checks as an option, without it being enabled by default.
                                                    Recommended only for sandboxes with no internet access.
  --allowedTools, --allowed-tools <tools...>        Comma or space-separated list of tool names to allow (e.g. "Bash(git:*) Edit")
  --append-system-prompt <prompt>                   Append a system prompt to the default system prompt
  --betas <betas...>                                Beta headers to include in API requests (API key users only)
  --chrome                                          Enable Claude in Chrome integration
  -c, --continue                                    Continue the most recent conversation in the current directory
  --dangerously-skip-permissions                    Bypass all permission checks. Recommended only for sandboxes with no internet access.
  -d, --debug [filter]                              Enable debug mode with optional category filtering (e.g., "api,hooks" or "!1p,!file")
  --debug-file <path>                               Write debug logs to a specific file path (implicitly enables debug mode)
  --disable-slash-commands                          Disable all skills
  --disallowedTools, --disallowed-tools <tools...>  Comma or space-separated list of tool names to deny (e.g. "Bash(git:*) Edit")
  --effort <level>                                  Effort level for the current session (low, medium, high)
  --fallback-model <model>                          Enable automatic fallback to specified model when default model is overloaded (only works
                                                    with --print)
  --file <specs...>                                 File resources to download at startup. Format: file_id:relative_path (e.g., --file
                                                    file_abc:doc.txt file_def:img.png)
  --fork-session                                    When resuming, create a new session ID instead of reusing the original (use with --resume
                                                    or --continue)
  --from-pr [value]                                 Resume a session linked to a PR by PR number/URL, or open interactive picker with optional
                                                    search term
  -h, --help                                        Display help for command
  --ide                                             Automatically connect to IDE on startup if exactly one valid IDE is available
  --include-partial-messages                        Include partial message chunks as they arrive (only works with --print and
                                                    --output-format=stream-json)
  --input-format <format>                           Input format (only works with --print): "text" (default), or "stream-json" (realtime
                                                    streaming input) (choices: "text", "stream-json")
  --json-schema <schema>                            JSON Schema for structured output validation. Example:
                                                    {"type":"object","properties":{"name":{"type":"string"}},"required":["name"]}
  --max-budget-usd <amount>                         Maximum dollar amount to spend on API calls (only works with --print)
  --mcp-config <configs...>                         Load MCP servers from JSON files or strings (space-separated)
  --mcp-debug                                       [DEPRECATED. Use --debug instead] Enable MCP debug mode (shows MCP server errors)
  --model <model>                                   Model for the current session. Provide an alias for the latest model (e.g. 'sonnet' or
                                                    'opus') or a model's full name (e.g. 'claude-sonnet-4-6').
  --no-chrome                                       Disable Claude in Chrome integration
  --no-session-persistence                          Disable session persistence - sessions will not be saved to disk and cannot be resumed
                                                    (only works with --print)
  --output-format <format>                          Output format (only works with --print): "text" (default), "json" (single result), or
                                                    "stream-json" (realtime streaming) (choices: "text", "json", "stream-json")
  --permission-mode <mode>                          Permission mode to use for the session (choices: "acceptEdits", "bypassPermissions",
                                                    "default", "dontAsk", "plan")
  --plugin-dir <paths...>                           Load plugins from directories for this session only (repeatable)
  -p, --print                                       Print response and exit (useful for pipes). Note: The workspace trust dialog is skipped
                                                    when Claude is run with the -p mode. Only use this flag in directories you trust.
  --replay-user-messages                            Re-emit user messages from stdin back on stdout for acknowledgment (only works with
                                                    --input-format=stream-json and --output-format=stream-json)
  -r, --resume [value]                              Resume a conversation by session ID, or open interactive picker with optional search term
  --session-id <uuid>                               Use a specific session ID for the conversation (must be a valid UUID)
  --setting-sources <sources>                       Comma-separated list of setting sources to load (user, project, local).
  --settings <file-or-json>                         Path to a settings JSON file or a JSON string to load additional settings from
  --strict-mcp-config                               Only use MCP servers from --mcp-config, ignoring all other MCP configurations
  --system-prompt <prompt>                          System prompt to use for the session
  --tmux                                            Create a tmux session for the worktree (requires --worktree). Uses iTerm2 native panes
                                                    when available; use --tmux=classic for traditional tmux.
  --tools <tools...>                                Specify the list of available tools from the built-in set. Use "" to disable all tools,
                                                    "default" to use all tools, or specify tool names (e.g. "Bash,Edit,Read").
  --verbose                                         Override verbose mode setting from config
  -v, --version                                     Output the version number
  -w, --worktree [name]                             Create a new git worktree for this session (optionally specify a name)

Commands:
  agents [options]                                  List configured agents
  auth                                              Manage authentication
  doctor                                            Check the health of your Claude Code auto-updater
  install [options] [target]                        Install Claude Code native build. Use [target] to specify version (stable, latest, or
                                                    specific version)
  mcp                                               Configure and manage MCP servers
  plugin                                            Manage Claude Code plugins
  setup-token                                       Set up a long-lived authentication token (requires Claude subscription)
  update|upgrade                                    Check for updates and install if available
liyuechun@liyuechuns-MacBook-Pro ~ %
步骤二:启动 Claude Code 并登录你的账户
要使用 Claude Code,你需要在 Terminal(终端) 中输入以下命令:
liyuechun@liyuechuns-MacBook-Pro ~ % claude
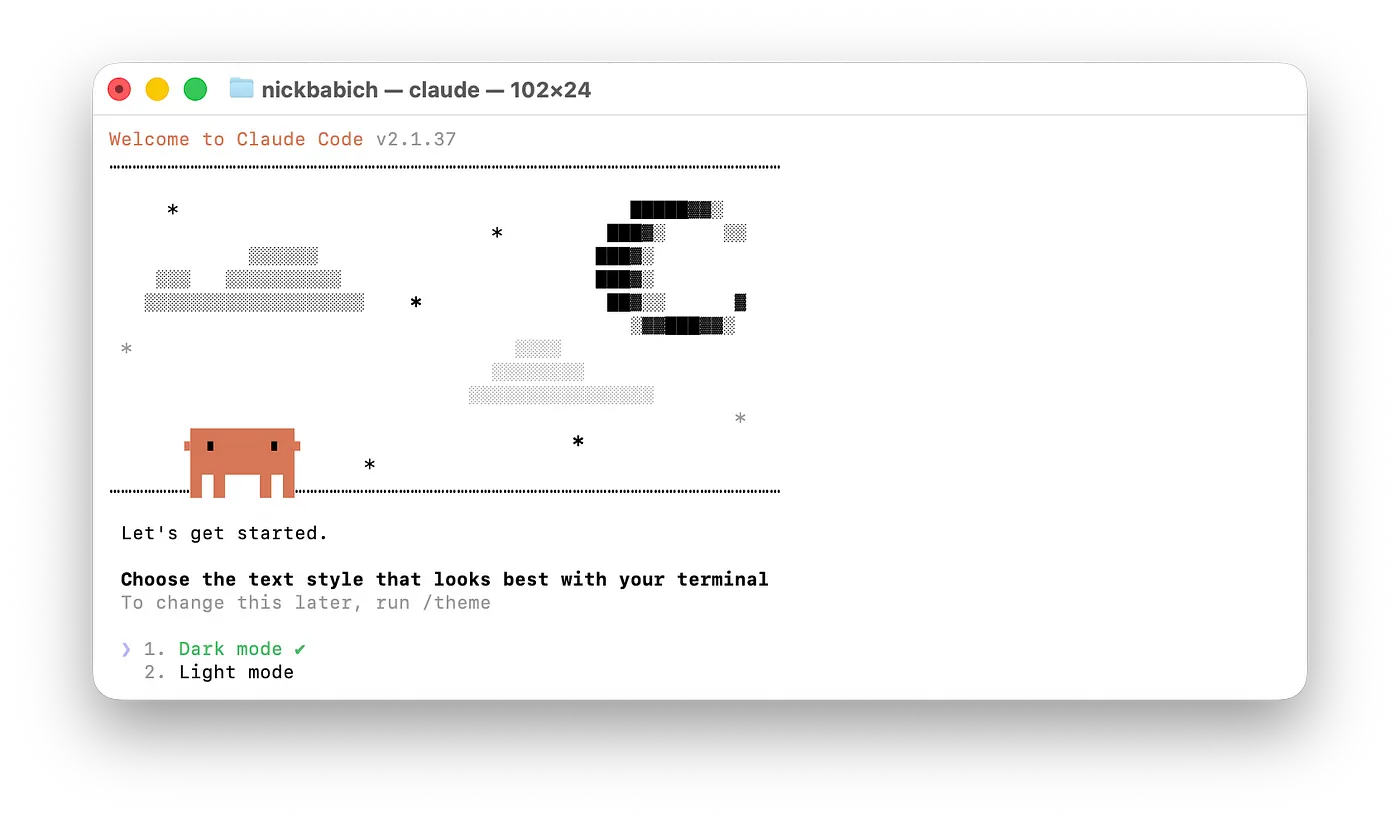
接下来,你会看到:
liyuechun@liyuechuns-MacBook-Pro ~ % claude
Welcome to Claude Code v2.1.50
…………………………………………………………………………………………………………………………………………………………

     *                                       █████▓▓░
                                 *         ███▓░     ░░
            ░░░░░░                        ███▓░
    ░░░   ░░░░░░░░░░                      ███▓░
   ░░░░░░░░░░░░░░░░░░░    *                ██▓░░      ▓
                                             ░▓▓███▓▓░
 *                                 ░░░░
                                 ░░░░░░░░
                               ░░░░░░░░░░░░░░░░
                                                      *
      ▗ ▗     ▖ ▖                       *
                      *
…………………         ………………………………………………………………………………………………………………

 Let's get started.

 Choose the text style that looks best with your terminal
 To change this later, run /theme

 ❯ 1. Dark mode ✔
   2. Light mode
   3. Dark mode (colorblind-friendly)
   4. Light mode (colorblind-friendly)
   5. Dark mode (ANSI colors only)
   6. Light mode (ANSI colors only)

╌╌╌╌╌╌╌╌╌╌╌╌╌╌╌╌╌╌╌╌╌╌╌╌╌╌╌╌╌╌╌╌╌╌╌╌╌╌╌╌╌╌╌╌╌╌╌╌╌╌╌╌╌╌╌╌╌╌╌╌╌╌╌╌╌╌╌╌╌╌╌╌╌╌╌╌╌╌╌╌╌╌╌╌╌╌╌╌╌╌╌╌╌╌╌╌╌╌╌╌╌╌╌╌╌╌╌╌╌╌╌╌╌╌╌╌╌╌╌╌╌╌╌╌╌╌╌╌╌╌╌╌╌╌╌╌╌╌╌╌╌╌╌
 1  function greet() {
 2 -  console.log("Hello, World!");
 2 +  console.log("Hello, Claude!");
 3  }
╌╌╌╌╌╌╌╌╌╌╌╌╌╌╌╌╌╌╌╌╌╌╌╌╌╌╌╌╌╌╌╌╌╌╌╌╌╌╌╌╌╌╌╌╌╌╌╌╌╌╌╌╌╌╌╌╌╌╌╌╌╌╌╌╌╌╌╌╌╌╌╌╌╌╌╌╌╌╌╌╌╌╌╌╌╌╌╌╌╌╌╌╌╌╌╌╌╌╌╌╌╌╌╌╌╌╌╌╌╌╌╌╌╌╌╌╌╌╌╌╌╌╌╌╌╌╌╌╌╌╌╌╌╌╌╌╌╌╌╌╌╌╌
 Syntax highlighting available only in native build
在选择默认配色模式之后,Claude 会提示你登录账号。
与网页版 Claude 提供有限的免费方案不同,Claude Code 无法免费使用,因此你需要订阅以下任一方案:Pro、Max 或 Enterprise。
我个人使用的是 Pro 方案,对于我的日常工作任务来说已经完全足够。
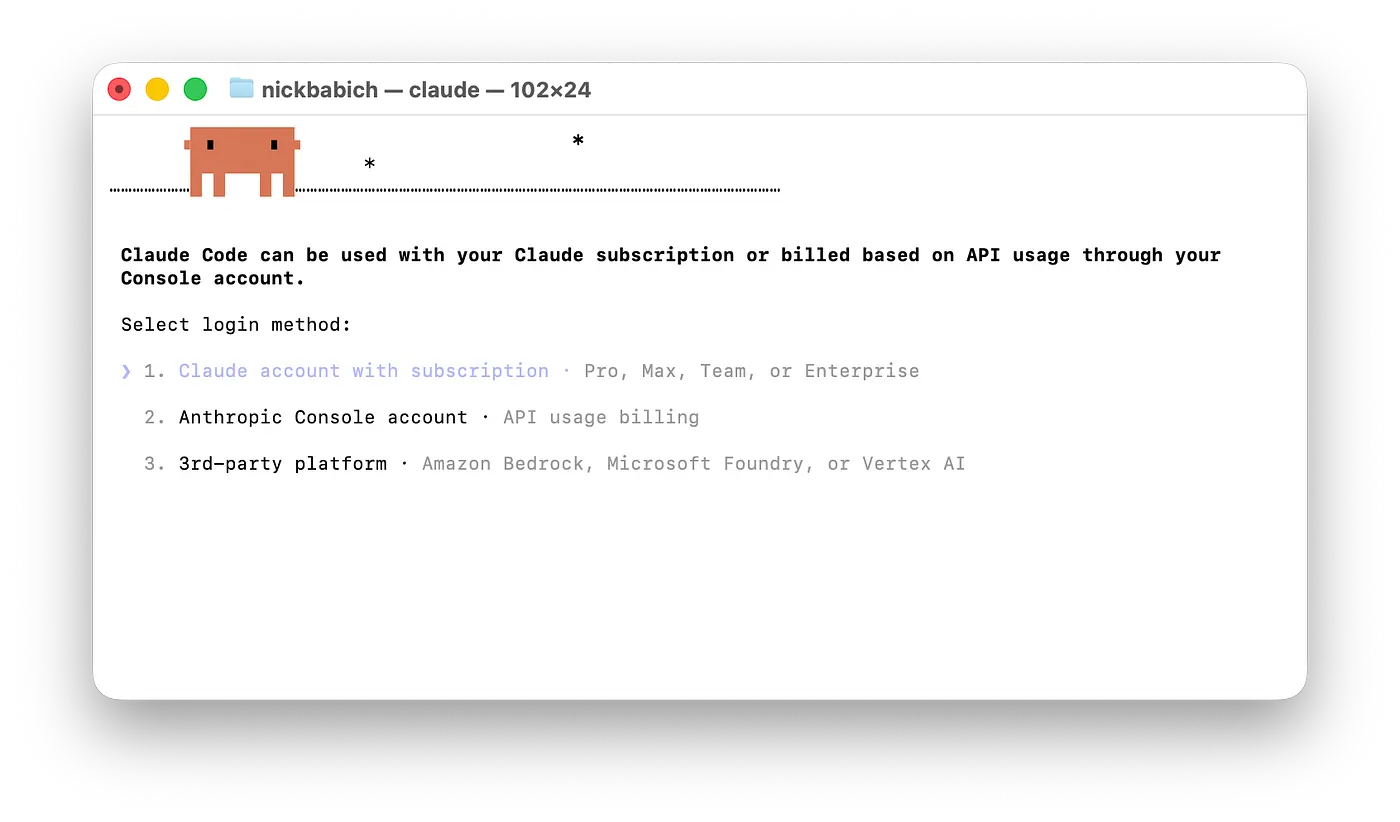
在我的情况下,我选择了选项 1:“Claude account with subscription(订阅版 Claude 账户)”,然后通过浏览器完成登录,并授权 Claude 使用相关信息。

完成所有步骤后,你就可以使用 Claude 了。

补充说明:当你开始使用 Claude Code 时,它会请求访问你的 root 目录(根目录)。
该访问权限用于让工具能够执行你所指示的相关任务。
Accessing workspace:

 /Users/liyuechun

 Quick safety check: Is this a project you created or one you trust? (Like your own code, a well-known open source project, or work from your
 team). If not, take a moment to review what's in this folder first.

 Claude Code'll be able to read, edit, and execute files here.

 Security guide

 ❯ 1. Yes, I trust this folder
   2. No, exit

 Enter to confirm · Esc to cancel
二、从零开始构建第一个 Skill
我们来创建一个 Skill,用于从用户访谈逐字稿(transcripts)中提取有价值的洞察。
简单来说,每一个 Skill 本质上都是一组命令,写在一个 Markdown(.md)文件中;当 Claude 执行某个特定任务时,就会调用并遵循这些命令来完成工作。
因此,我们首先需要创建一个目录,用来集中存放我们所有的 Skills。
步骤一:创建用于存放脚本的文件夹和文件
下面是一条命令,你需要在终端中输入它,用于创建一个用于分析访谈逐字稿的脚本:
mkdir -p ~/.claude/skills/interview-insights
执行完mkdir -p ~/.claude/skills/interview-insights命令用,我们打开一个新的终端,并通过命令code ~/.claude(备注,这里我是安装了vscode,并在vscode里面安装了code命令,所以可以直接在终端里面通过code ~/.claude打开~/.claude文件夹)。
VSCode命令行配置中间下插曲(已经安装的直接跳过即可):
🚀 Google搜索VSCode下载直接先安装(接下来按照下面的步骤直接操作即可配置code命令)
1️⃣ 打开 VS Code 应用 2️⃣ 按:
Command + Shift + P
3️⃣ 输入:
Shell Command: Install 'code' command in PATH
4️⃣ 回车确认 5️⃣ 关闭终端,重新打开一个终端 6️⃣ 再执行:
code ~/.claude
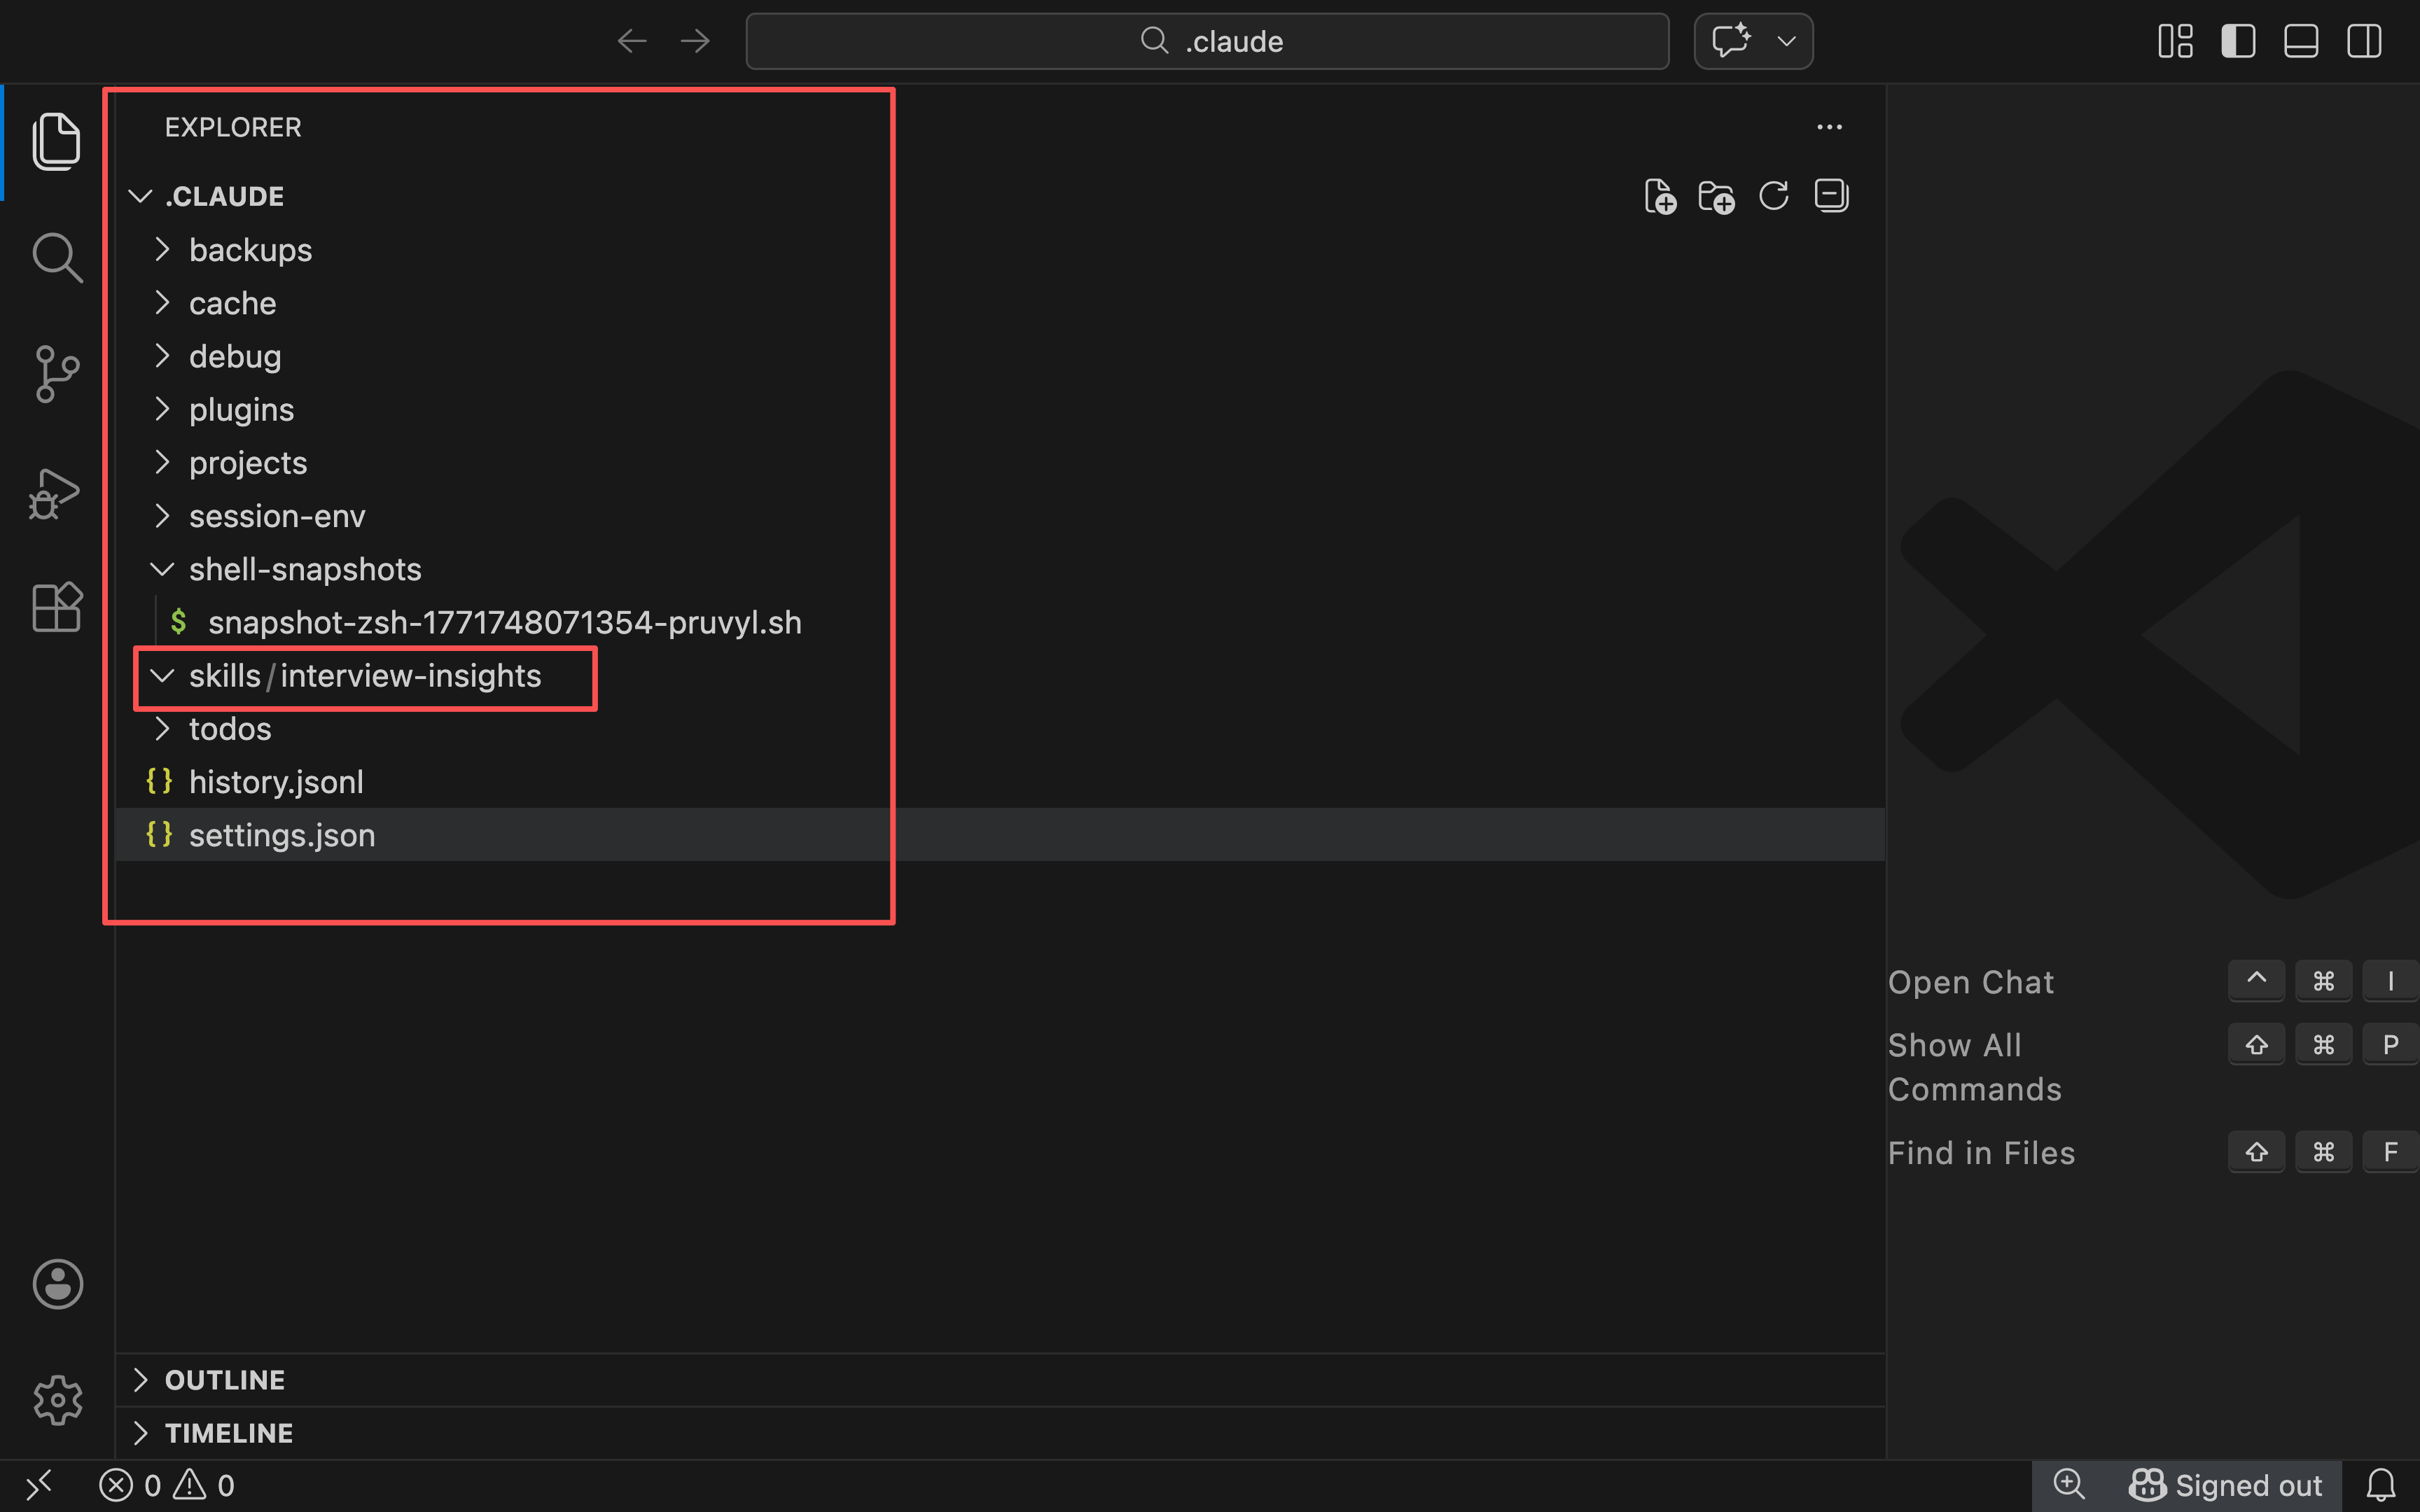
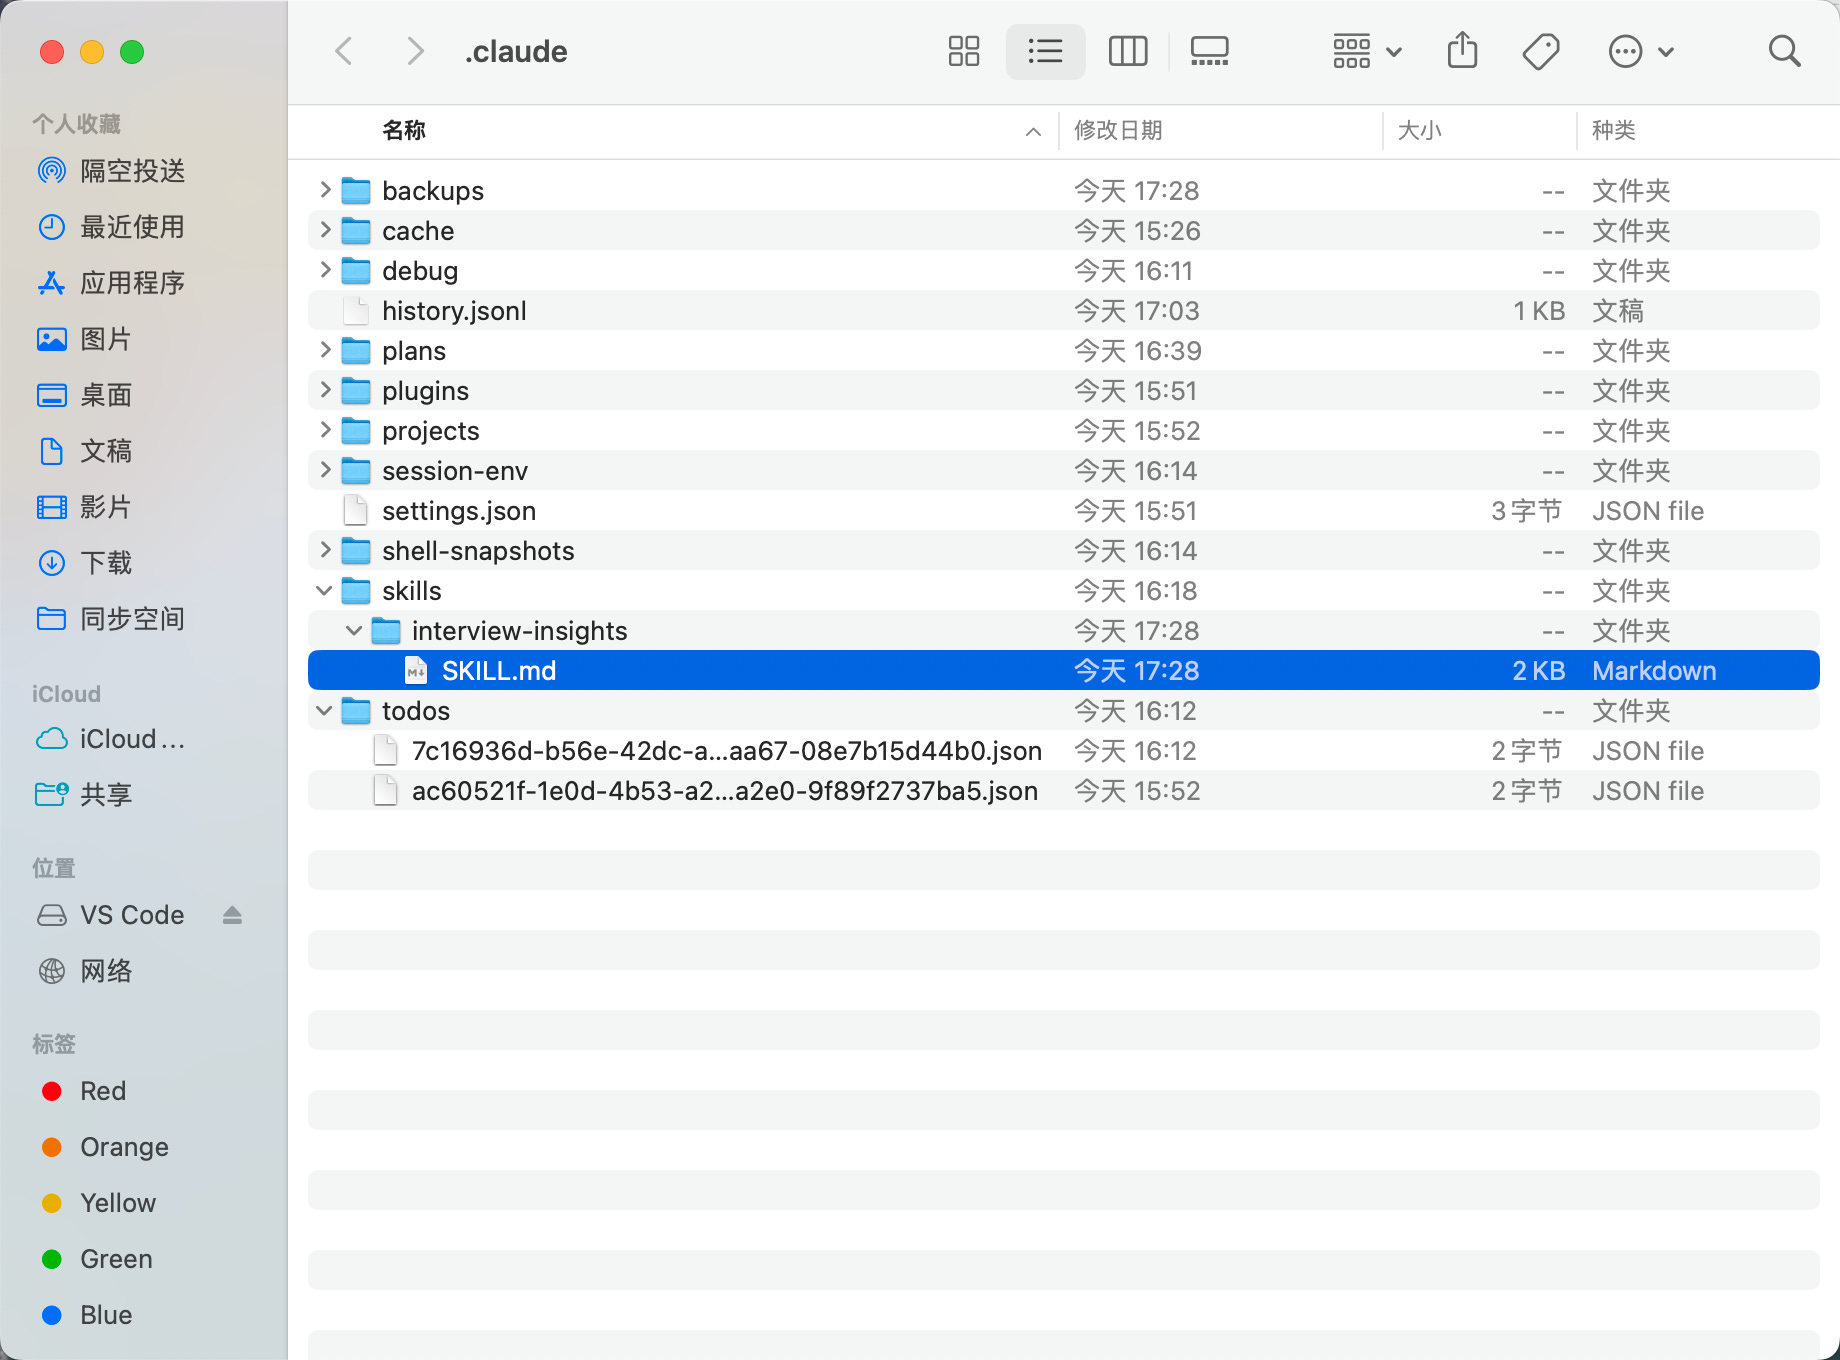
按照这种目录结构,你会把所有的 Skills 都统一放在一个名为 /skills/ 的父级目录中。
步骤二:编辑 SKILL.md 文件内容
每一个 Skill 都需要包含一个 SKILL.md 文件,该文件由两个部分组成:
YAML 格式的 Frontmatter(位于
---标记之间) ,这一部分用于告诉 Claude 在什么情境或条件下应当调用该 Skill。Markdown 内容(操作指令部分),这一部分包含当 Skill 被调用时,Claude 需要遵循并执行的具体指令。
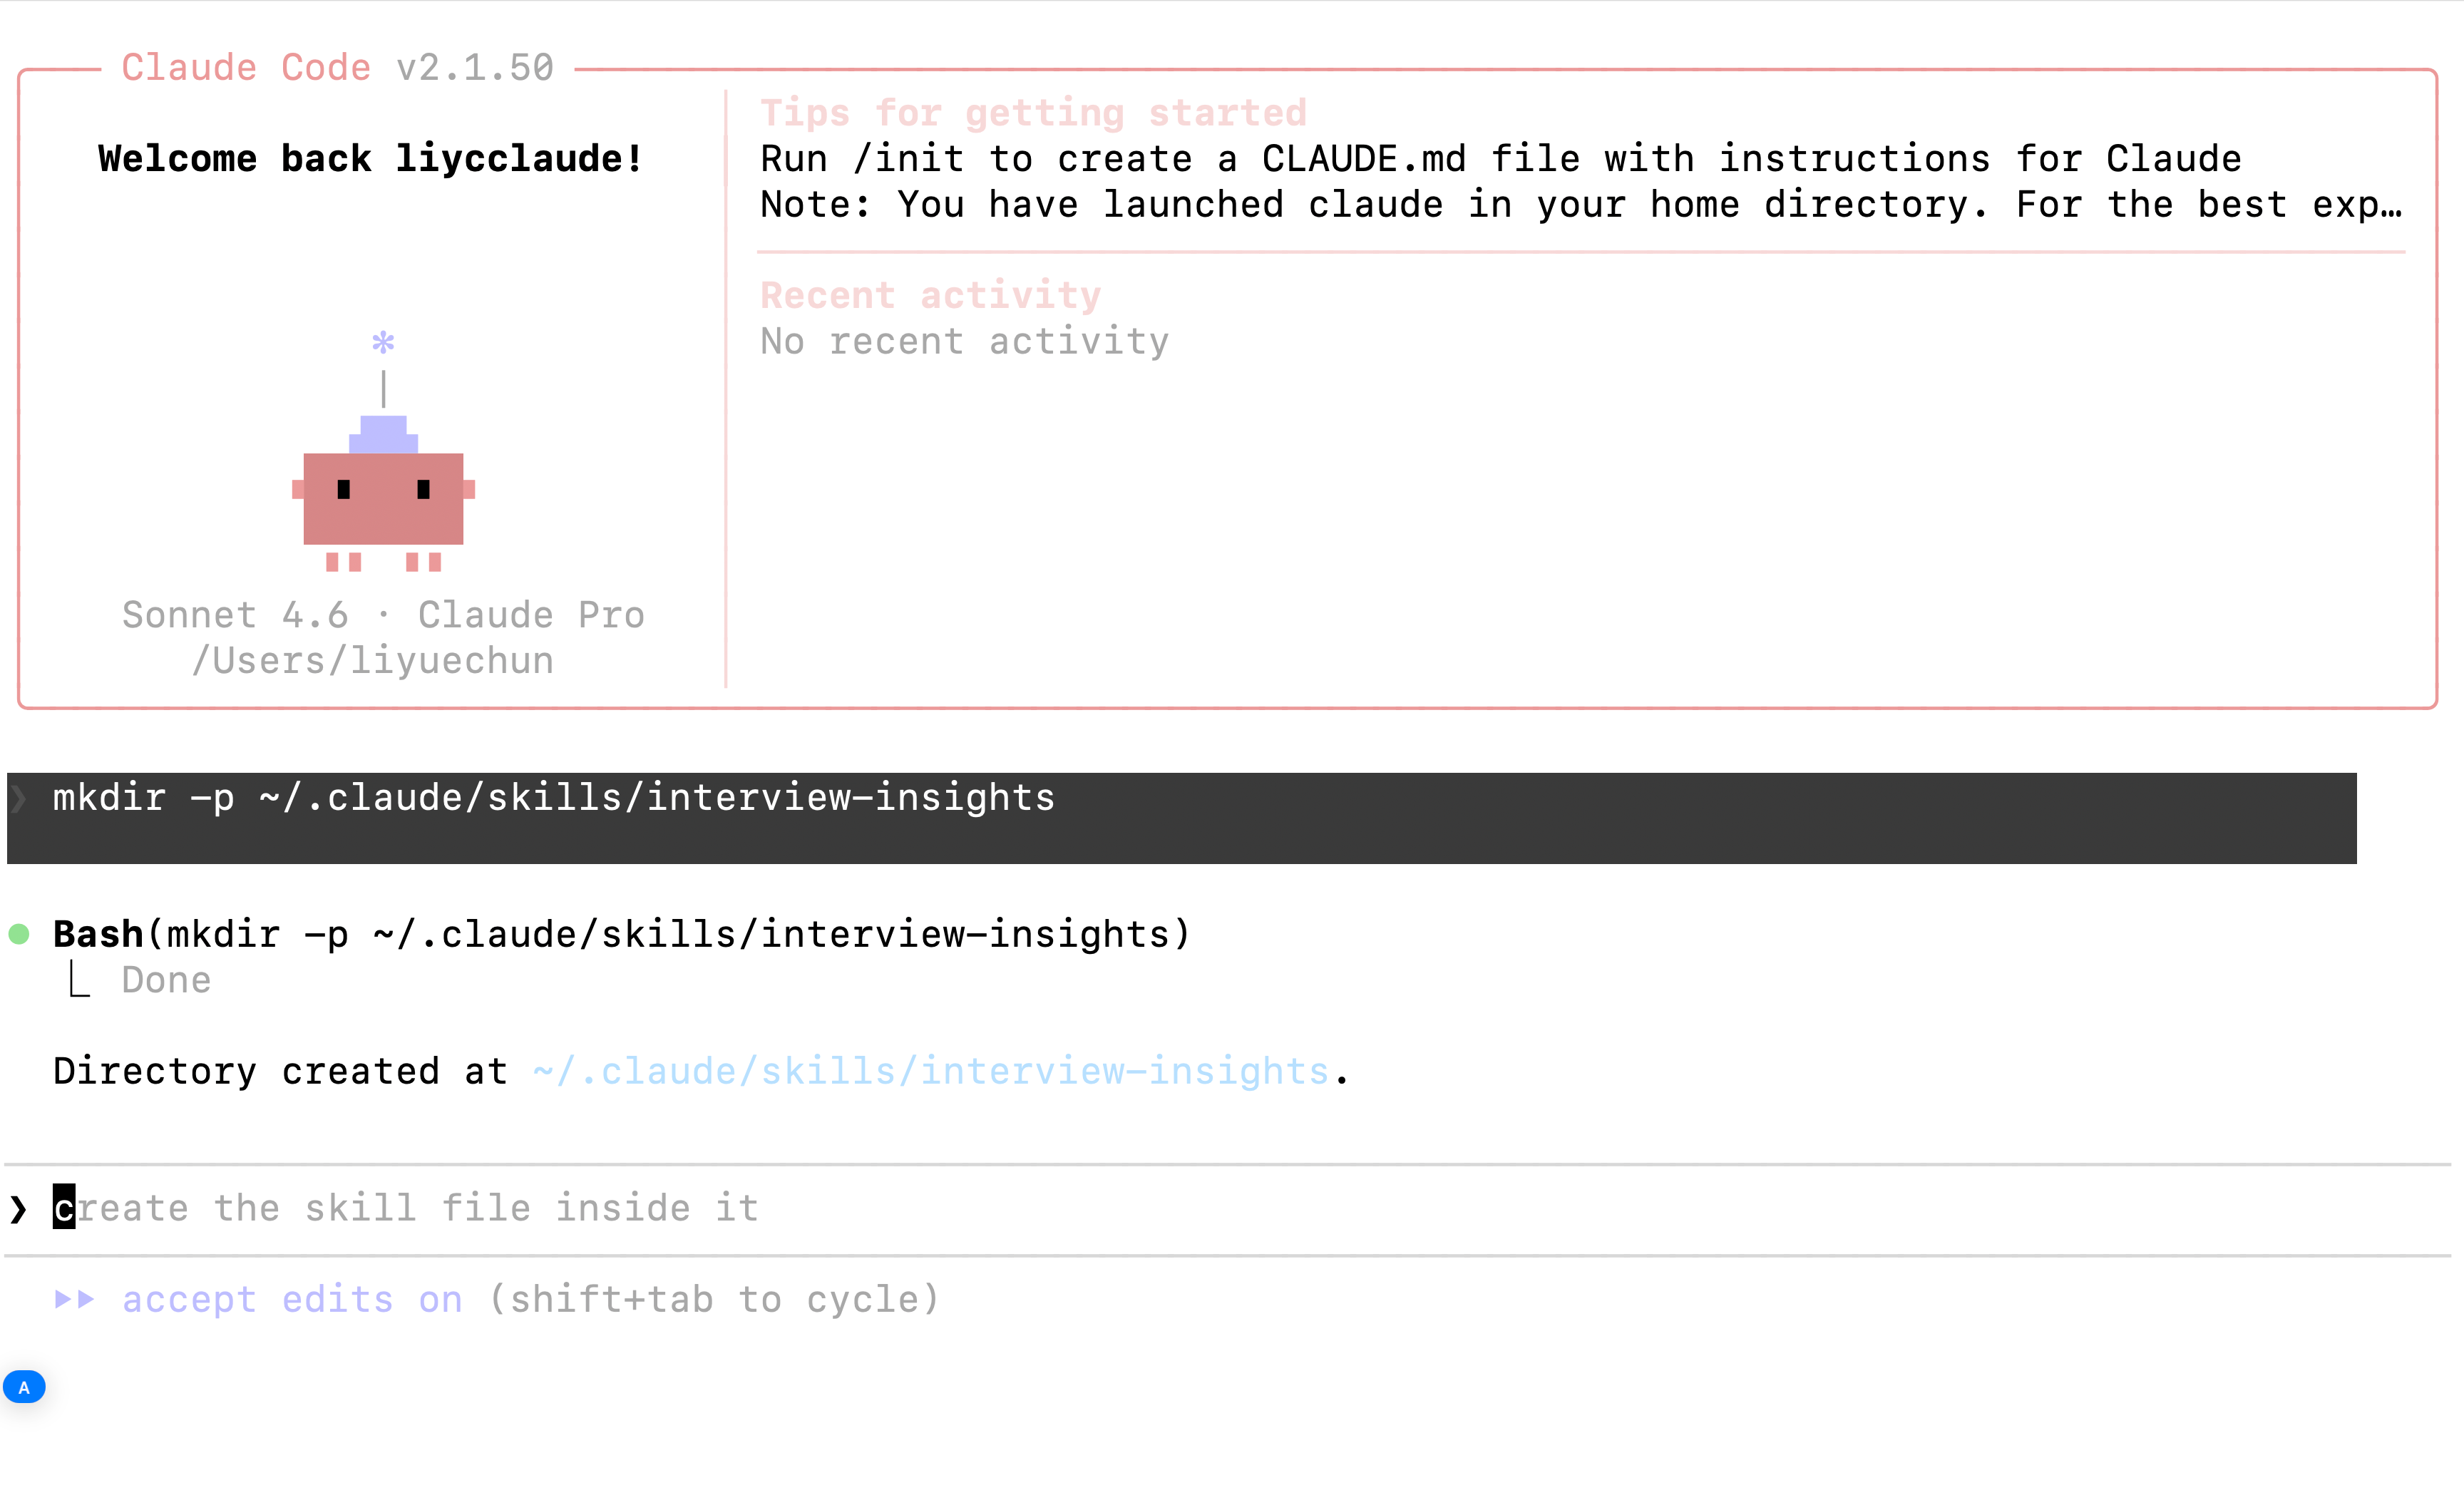
╭─── Claude Code v2.1.50 ─────────────────────────────────────────────────────────────────────────────────╮
│                              │ Tips for getting started                                                 │
│   Welcome back liycclaude!   │ Run /init to create a CLAUDE.md file with instructions for Claude        │
│                              │ Note: You have launched claude in your home directory. For the best exp… │
│                              │ ──────────────────────────────────────────────────────────────────────── │
│                              │ Recent activity                                                          │
│               ✻              │ No recent activity                                                       │
│               |              │                                                                          │
│              ▟█▙             │                                                                          │
│           ▗ ▗   ▖ ▖          │                                                                          │
│                              │                                                                          │
│             ▘▘ ▝▝            │                                                                          │
│    Sonnet 4.6 · Claude Pro   │                                                                          │
│       /Users/liyuechun       │                                                                          │
╰─────────────────────────────────────────────────────────────────────────────────────────────────────────╯

❯ mkdir -p ~/.claude/skills/interview-insights

⏺ Bash(mkdir -p ~/.claude/skills/interview-insights)
  ⎿  Done
⏺ Directory created at ~/.claude/skills/interview-insights.
───────────────────────────────────────────────────────────────────────────────────────────────────────────
❯ ~/.claude/skills/interview-insights/SKILL.md
───────────────────────────────────────────────────────────────────────────────────────────────────────────
  ⏵⏵ accept edits on (shift+tab to cycle)
当你提交这条命令时(注意,我在命令中文件路径前并没有使用 touch),Claude 会先检查对应的 .md 文件是否已经存在。
如果文件不存在,它会询问你是否要创建一个新的 .md 文件。
在你确认之后,Claude 就会为你自动生成一个新的 Skill。
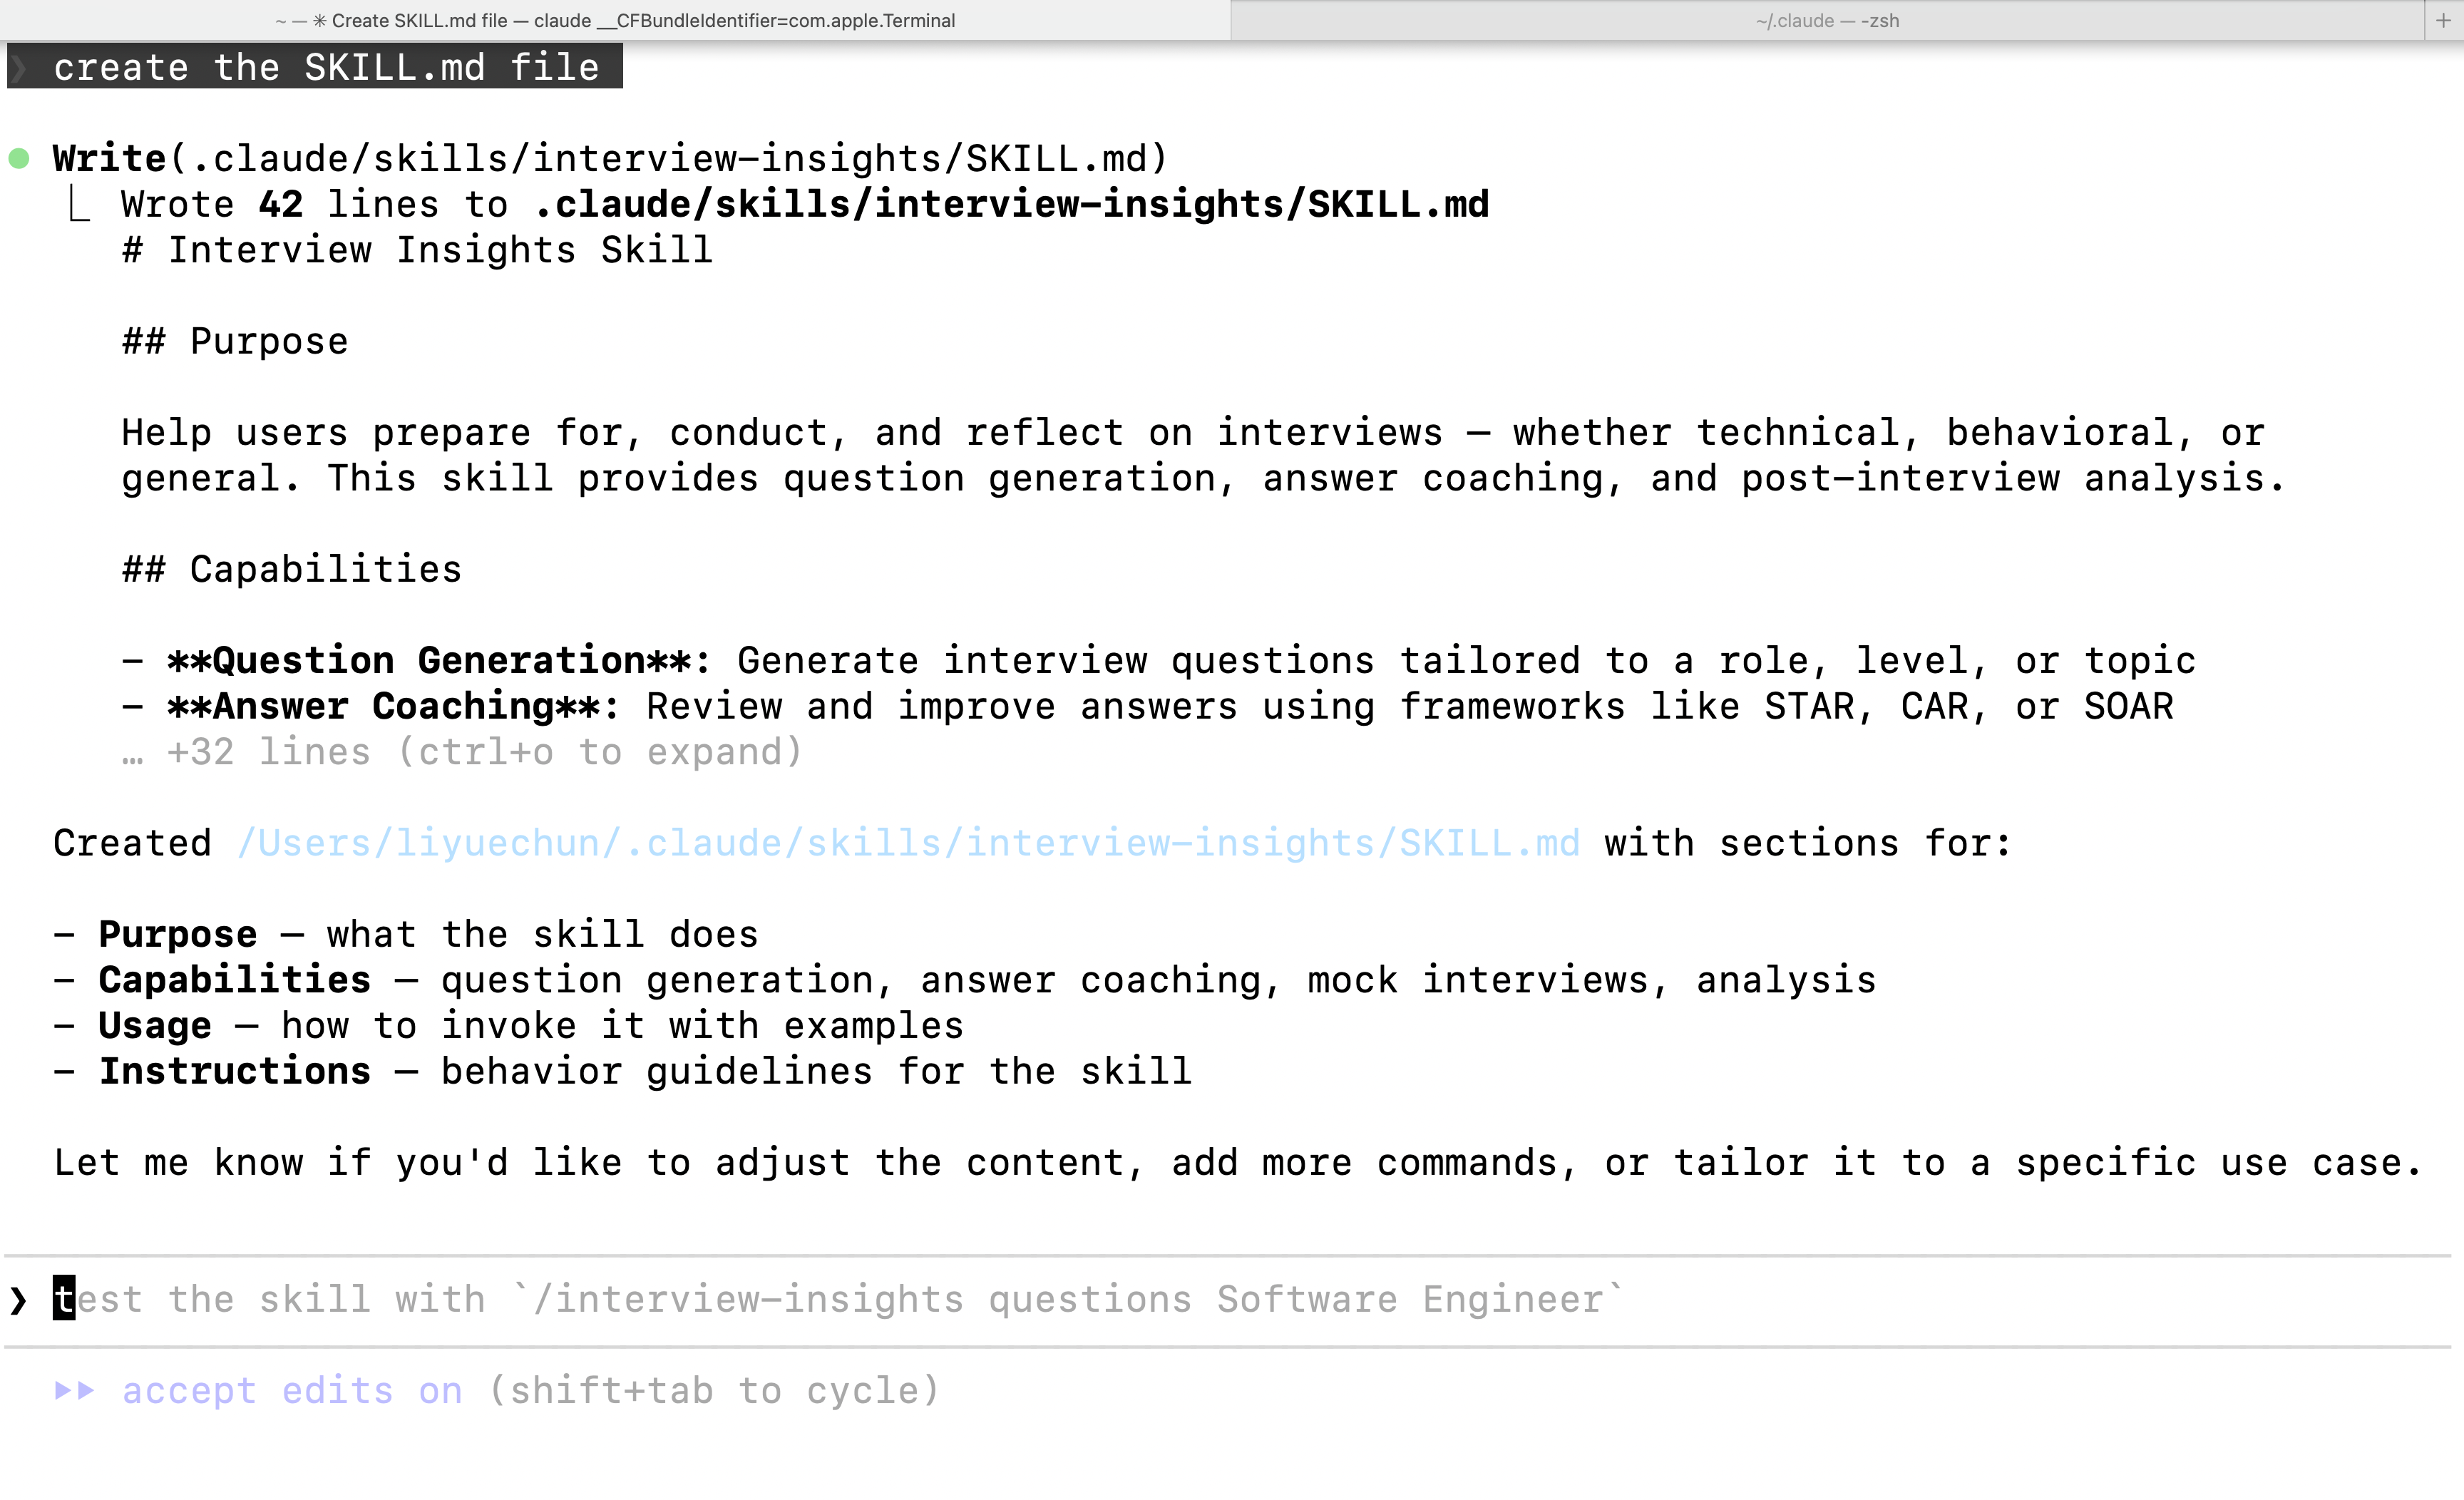
正如你所看到的,Claude 已经为我们自动生成了一个完整的 Skill。
更令人惊喜的是,它会将我们提供的 Skill 名称(例如 interview-insights)作为上下文依据,从而生成与该名称高度匹配、语义一致的技能内容。
补充说明:SKILL.md 文件会被创建在你工作区中的 /.claude 目录下(也就是在步骤 2 中,Claude 请求访问的那个目录)。
需要注意的是,该目录名称前带有一个点号(.)。
在 Mac 系统中,任何以点号(.)开头的文件或文件夹都会被系统视为“隐藏项目”,默认情况下不会在文件浏览器中直接显示。
步骤三:检查与完善 SKILL.md 内容
当你打开该 Skill 文件后,你会看到如下内容:
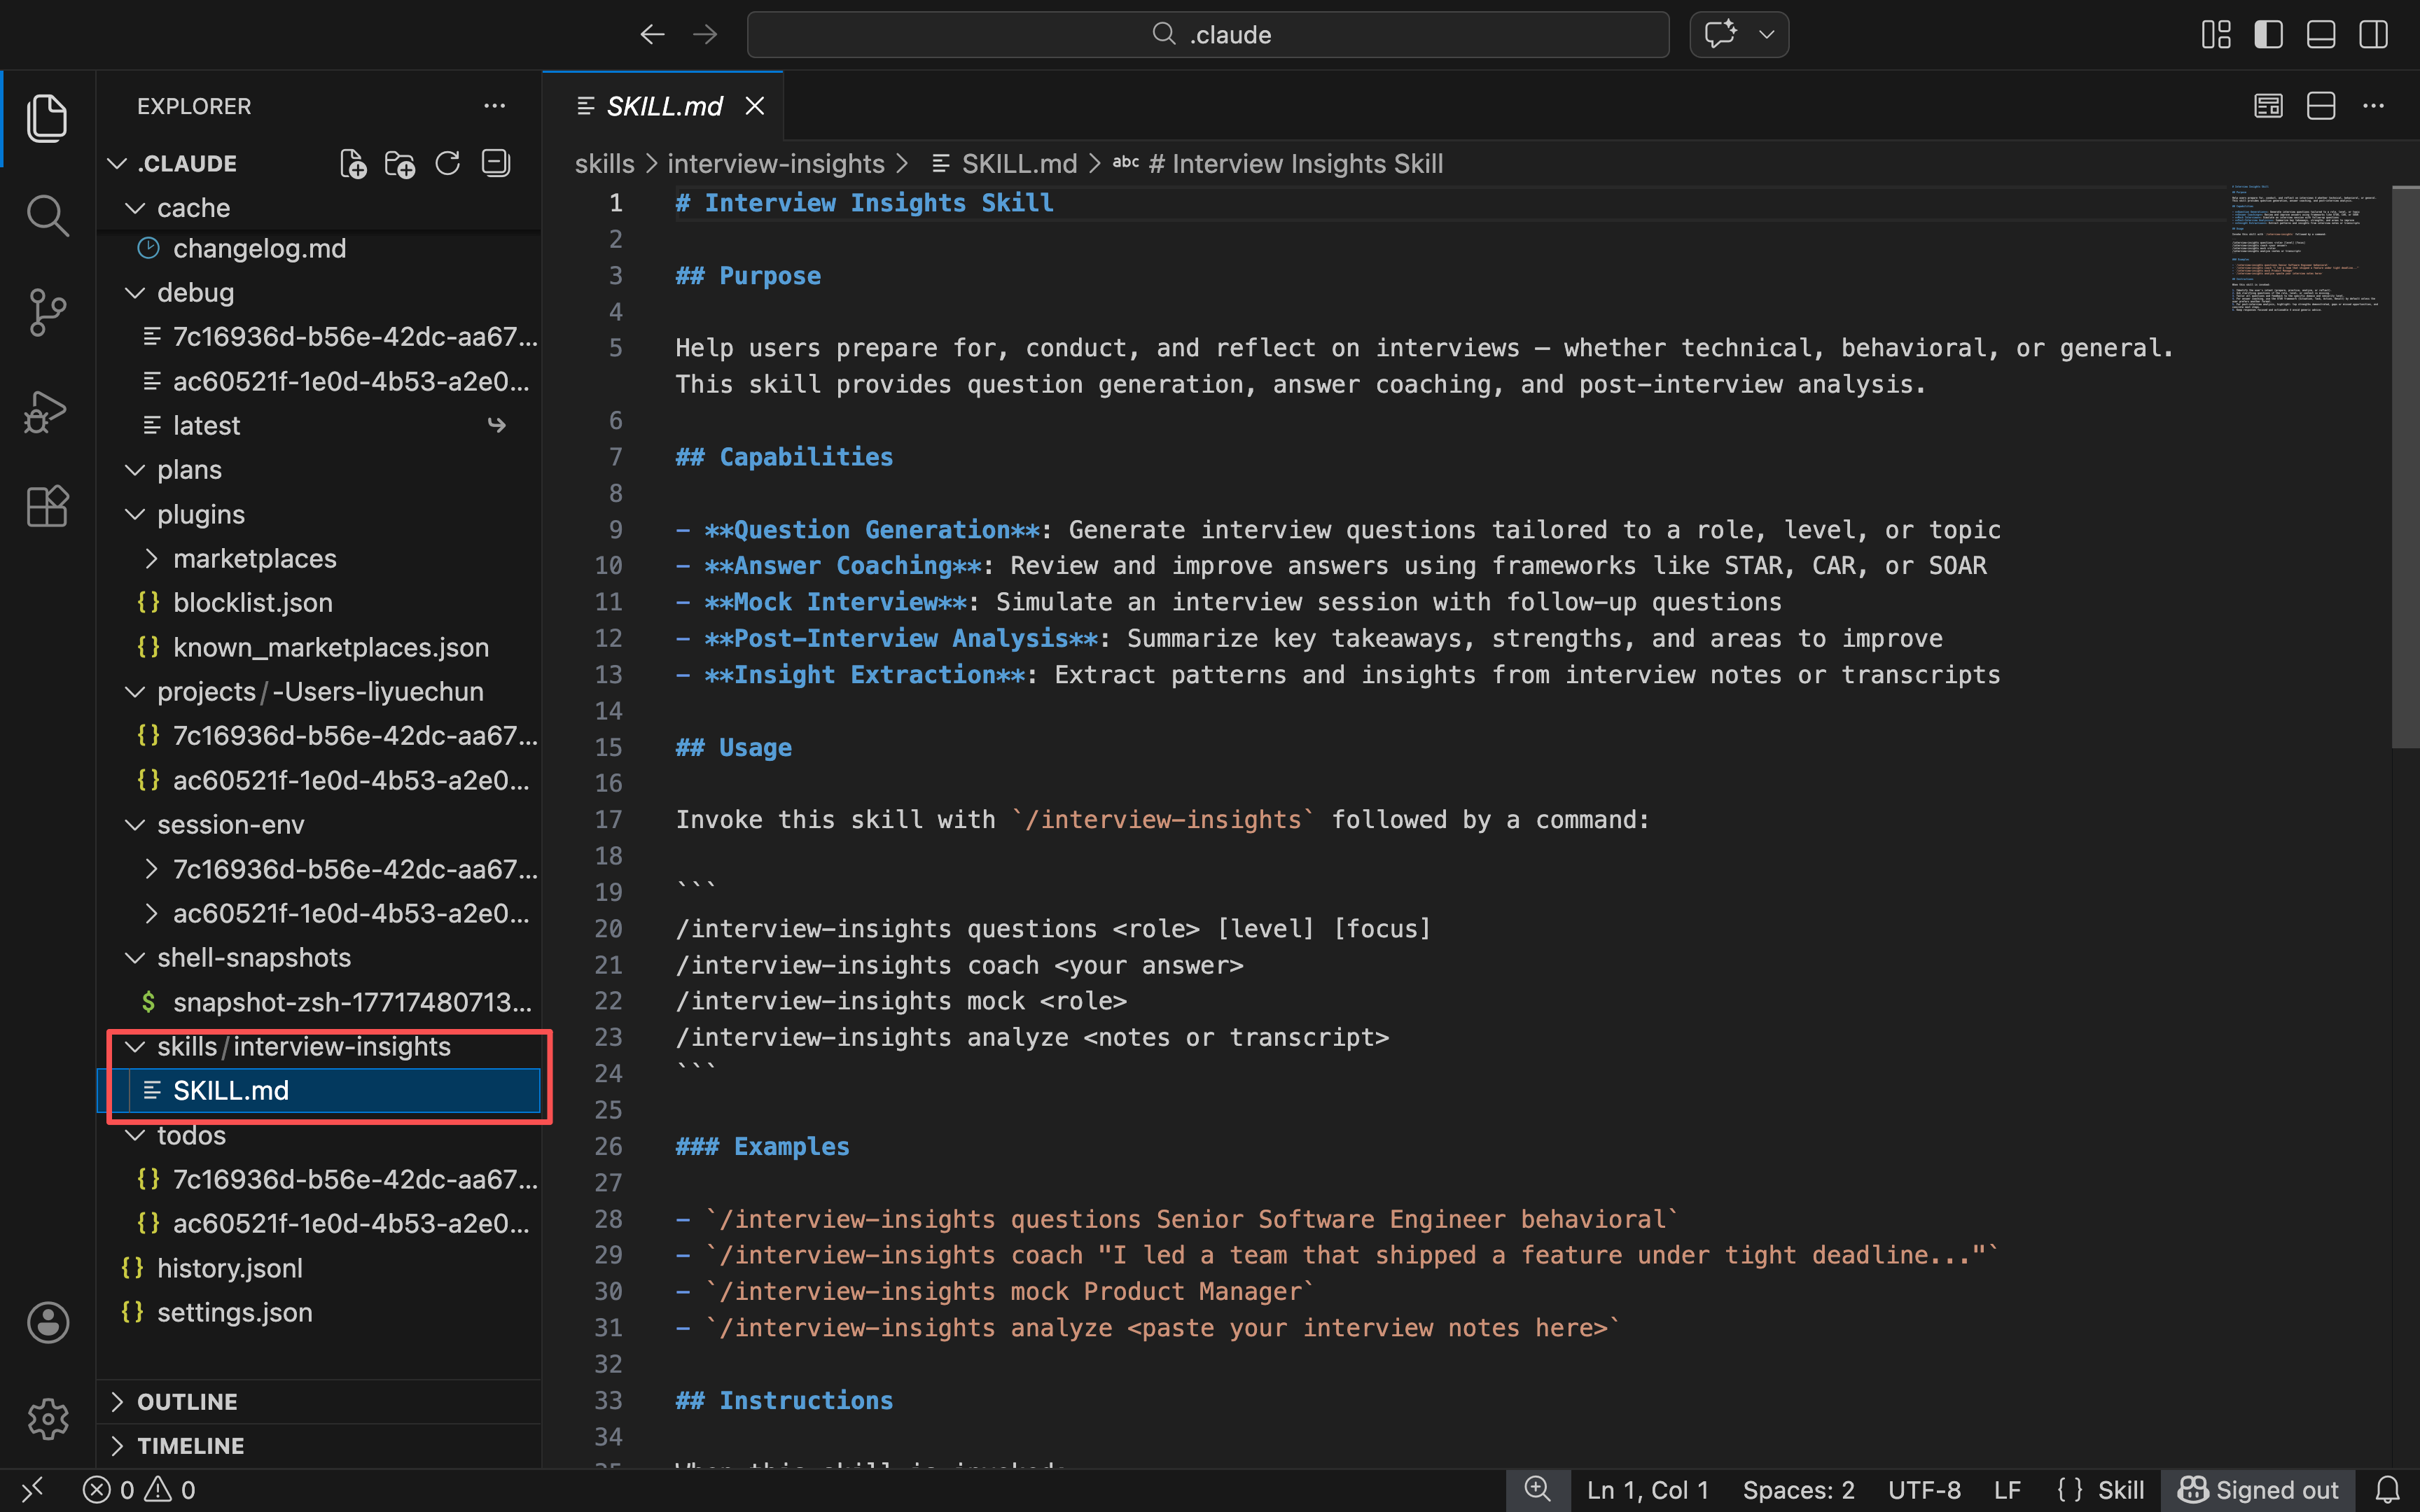
Claude 为我们创建了一个用于用户研究分析的 Skill,它能够处理访谈逐字稿,并提取结构化、可执行的洞察结果。
正如你所看到的,这个文件采用了清晰的层级结构(#、## 等标题标记),因此整体内容非常易于浏览与理解。
这个文件内容非常直观,而且作为一个真正可用于用户研究的 Skill 初稿,它已经相当优秀。
不过,我想特别强调输出结果中的一个关键点:
该 Skill 会系统性地提取以下内容:
主题与模式(Themes and patterns)
原始逐字引用(Verbatim quotes)
痛点(Pain points)
用户需求与目标(User needs and goals)
意外发现(Unexpected discoveries)
根据你所在组织的实际需求,对输出结构进行调整始终是一个好习惯。
例如,在我的实际场景中,我希望额外突出受访者所体验到的情绪状态。如果我们想将这一指令加入 Skill 中,就需要:
要么直接修改原始的 SKILL.md 文件(在你常用的编辑器中手动编辑);
要么让 Claude 帮我们自动更新这个 Skill。
在我的情况下,我选择第二种方式,并在使用 Claude Code 的终端窗口中输入以下指令:
> 更新这个 Skill,确保它能够重点提炼并强调受访者的情绪体验。
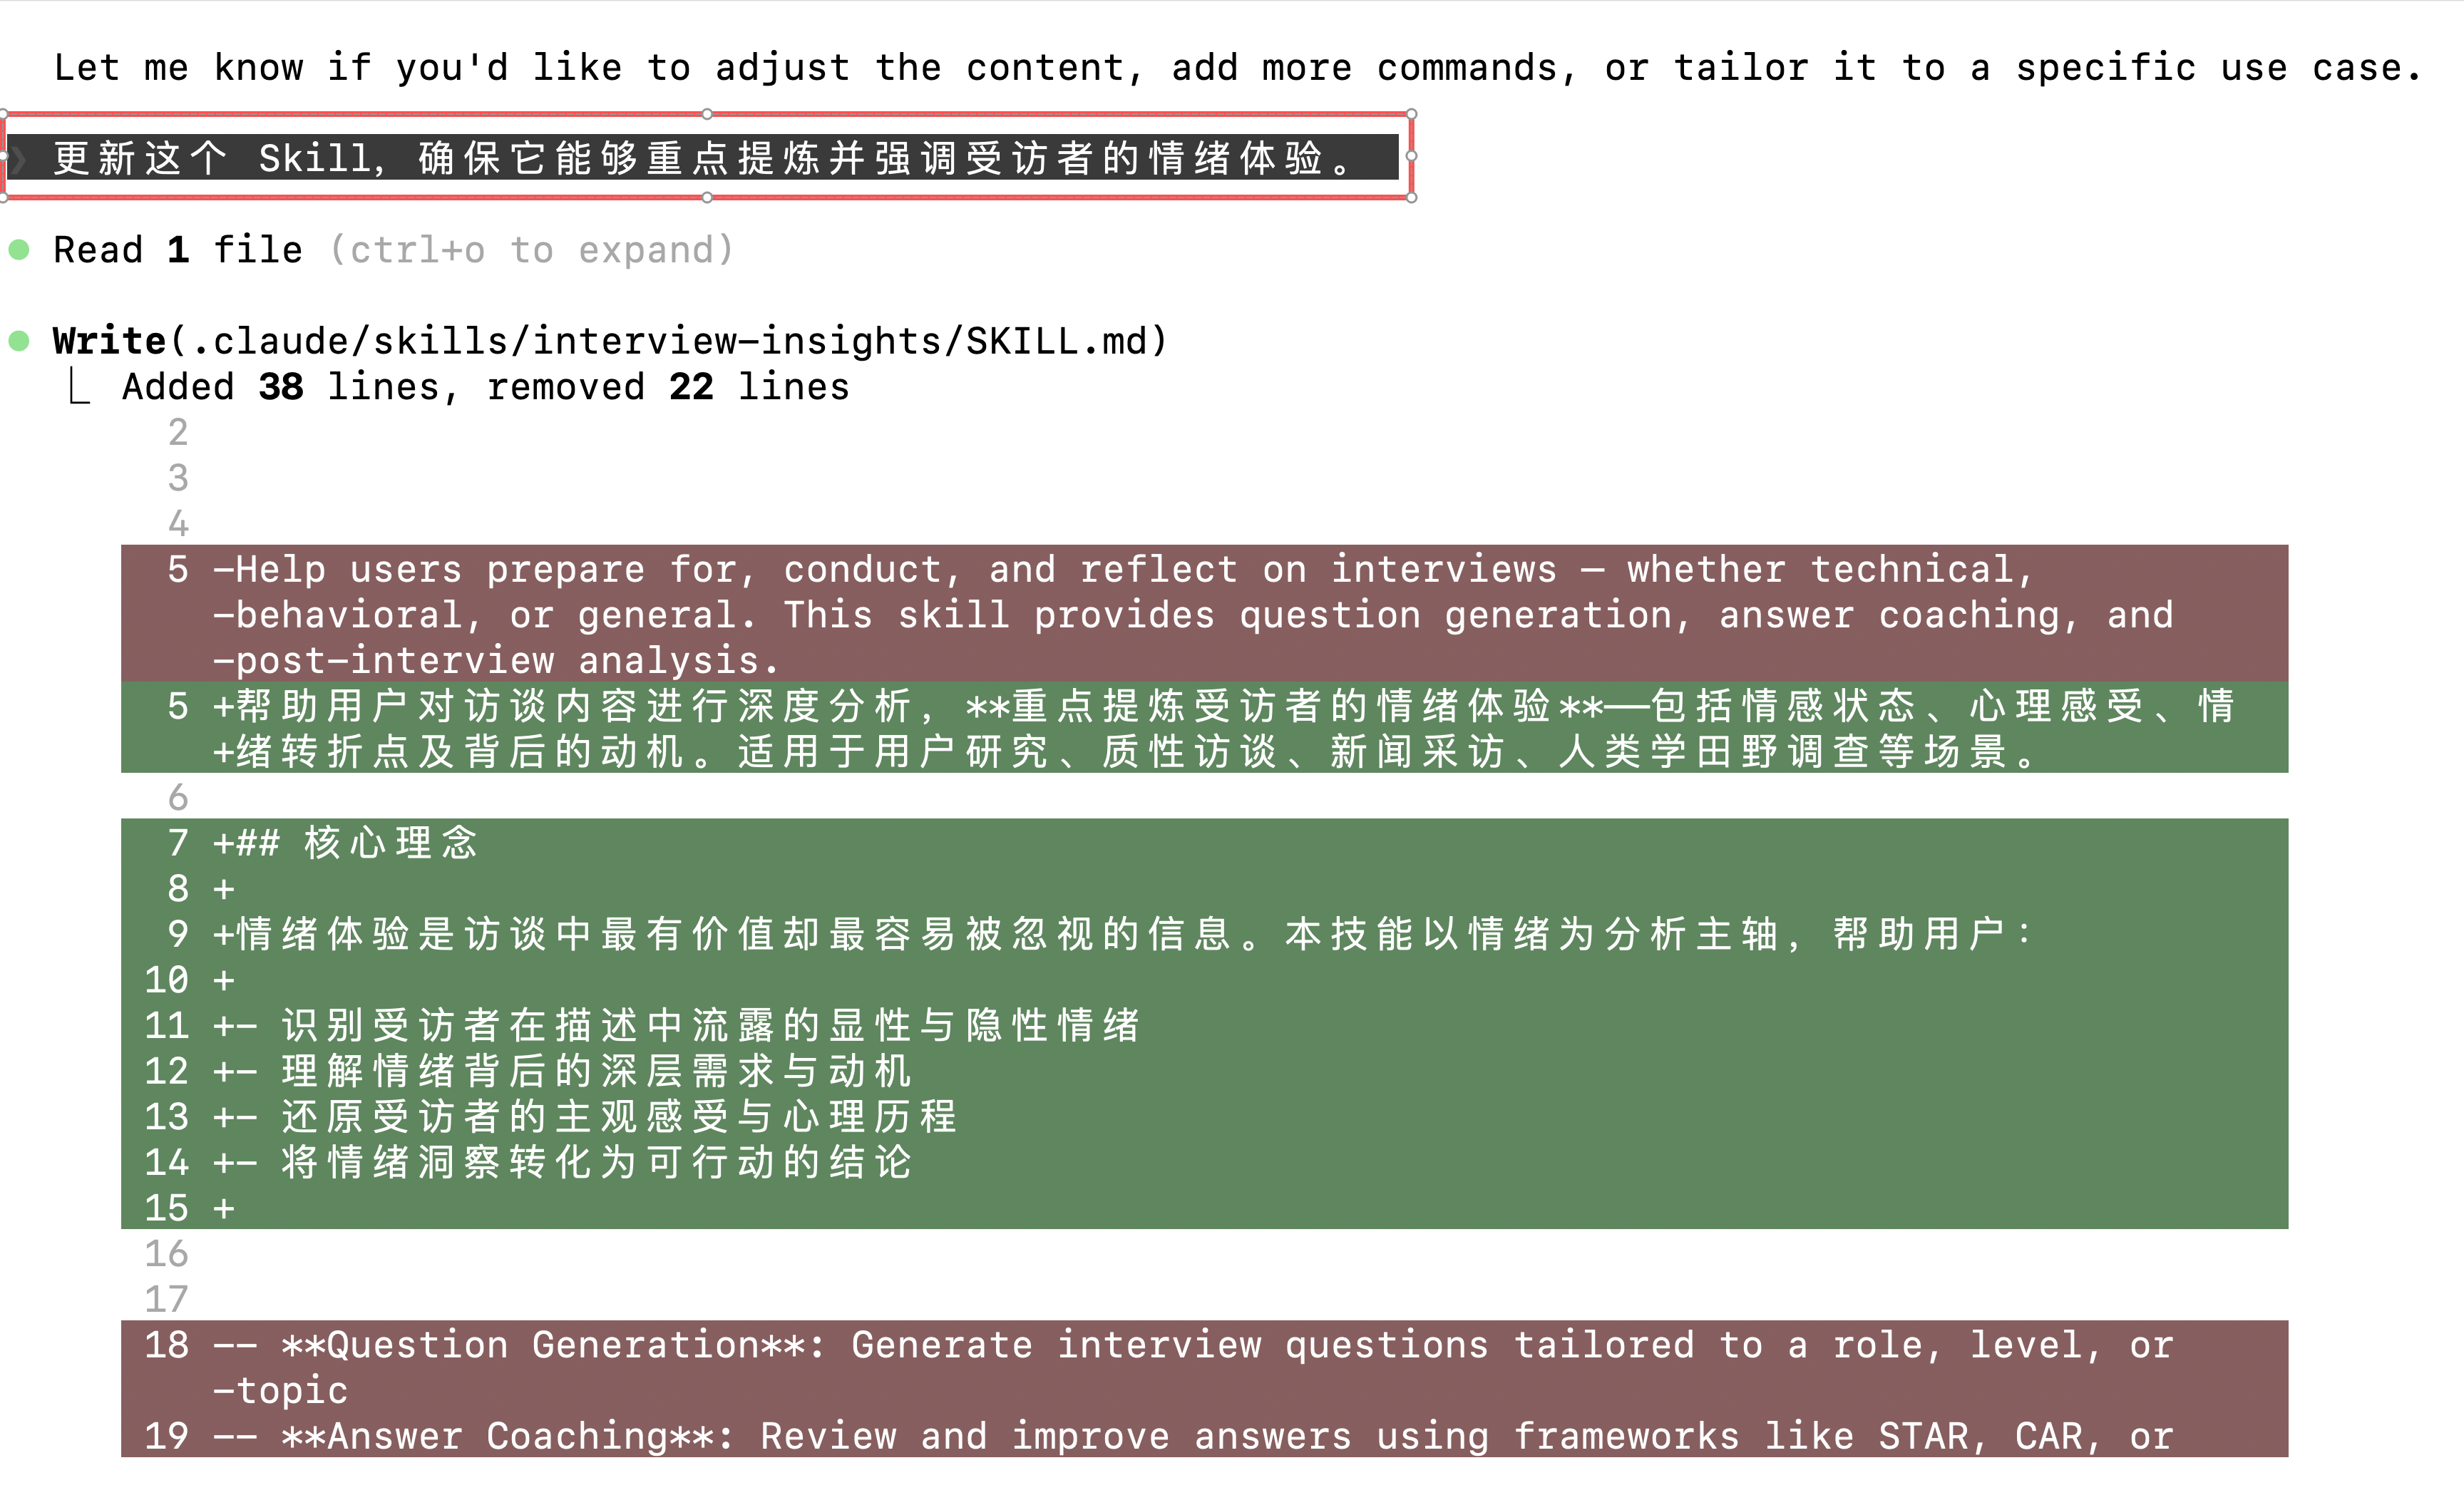
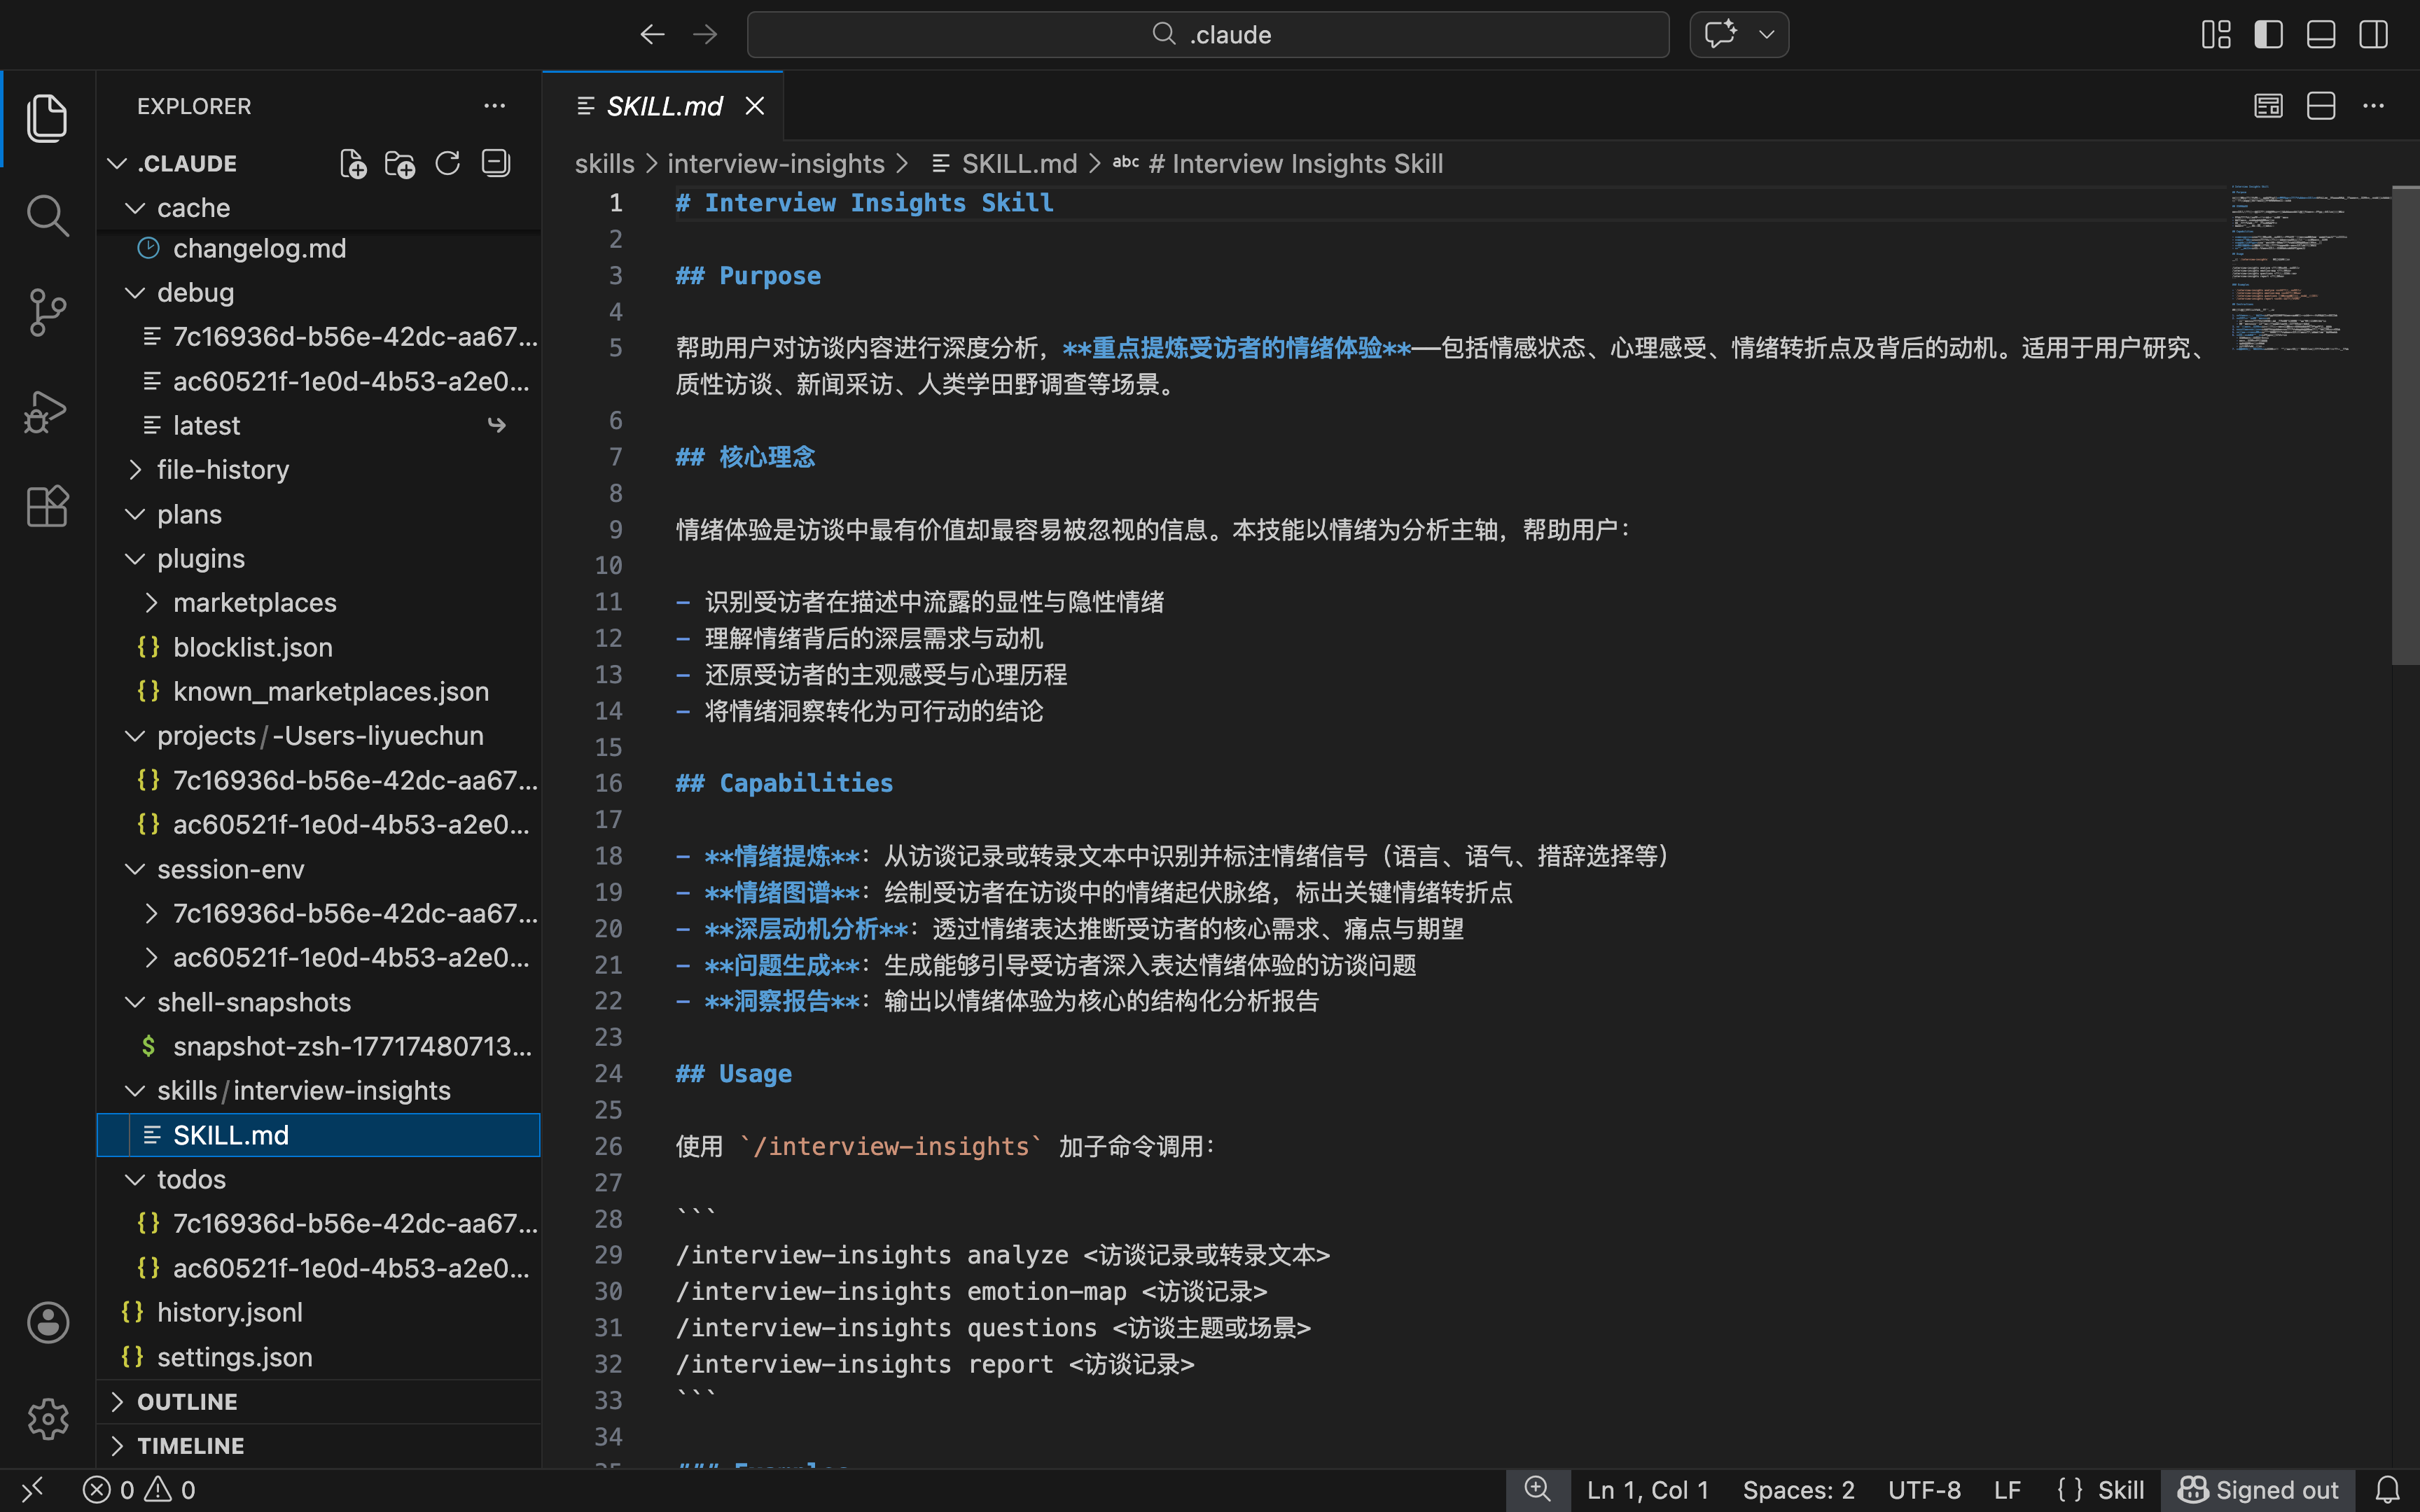
执行完更新这个 Skill,确保它能够重点提炼并强调受访者的情绪体验。指令后,SKILL.md文件的内容更新版如下:
# Interview Insights Skill
## Purpose
帮助用户对访谈内容进行深度分析,**重点提炼受访者的情绪体验**——包括情感状态、心理感受、情绪转折点及背后的动机。适用于用户研究、质性访谈、新闻采访、人类学田野调查等场景。
## 核心理念
情绪体验是访谈中最有价值却最容易被忽视的信息。本技能以情绪为分析主轴,帮助用户:
- 识别受访者在描述中流露的显性与隐性情绪
- 理解情绪背后的深层需求与动机
- 还原受访者的主观感受与心理历程
- 将情绪洞察转化为可行动的结论
## Capabilities
- **情绪提炼**:从访谈记录或转录文本中识别并标注情绪信号(语言、语气、措辞选择等)
- **情绪图谱**:绘制受访者在访谈中的情绪起伏脉络,标出关键情绪转折点
- **深层动机分析**:透过情绪表达推断受访者的核心需求、痛点与期望
- **问题生成**:生成能够引导受访者深入表达情绪体验的访谈问题
- **洞察报告**:输出以情绪体验为核心的结构化分析报告
## Usage
使用 `/interview-insights` 加子命令调用:
```
/interview-insights analyze <访谈记录或转录文本>
/interview-insights emotion-map <访谈记录>
/interview-insights questions <访谈主题或场景>
/interview-insights report <访谈记录>
```
### Examples
- `/interview-insights analyze <粘贴访谈转录文本>`
- `/interview-insights emotion-map <粘贴访谈记录>`
- `/interview-insights questions 用户对新功能上线后的使用体验`
- `/interview-insights report <粘贴多段访谈内容>`
## Instructions
调用本技能时,按以下原则执行:
1. **以情绪为第一视角**:分析时优先识别情绪信号,再结合事实内容理解其意义。
2. **区分显性与隐性情绪**:
- 显性情绪:受访者直接表达的感受(如"我很沮丧"、"这让我很兴奋")
- 隐性情绪:通过措辞、停顿、语气、比喻等间接透露的情感
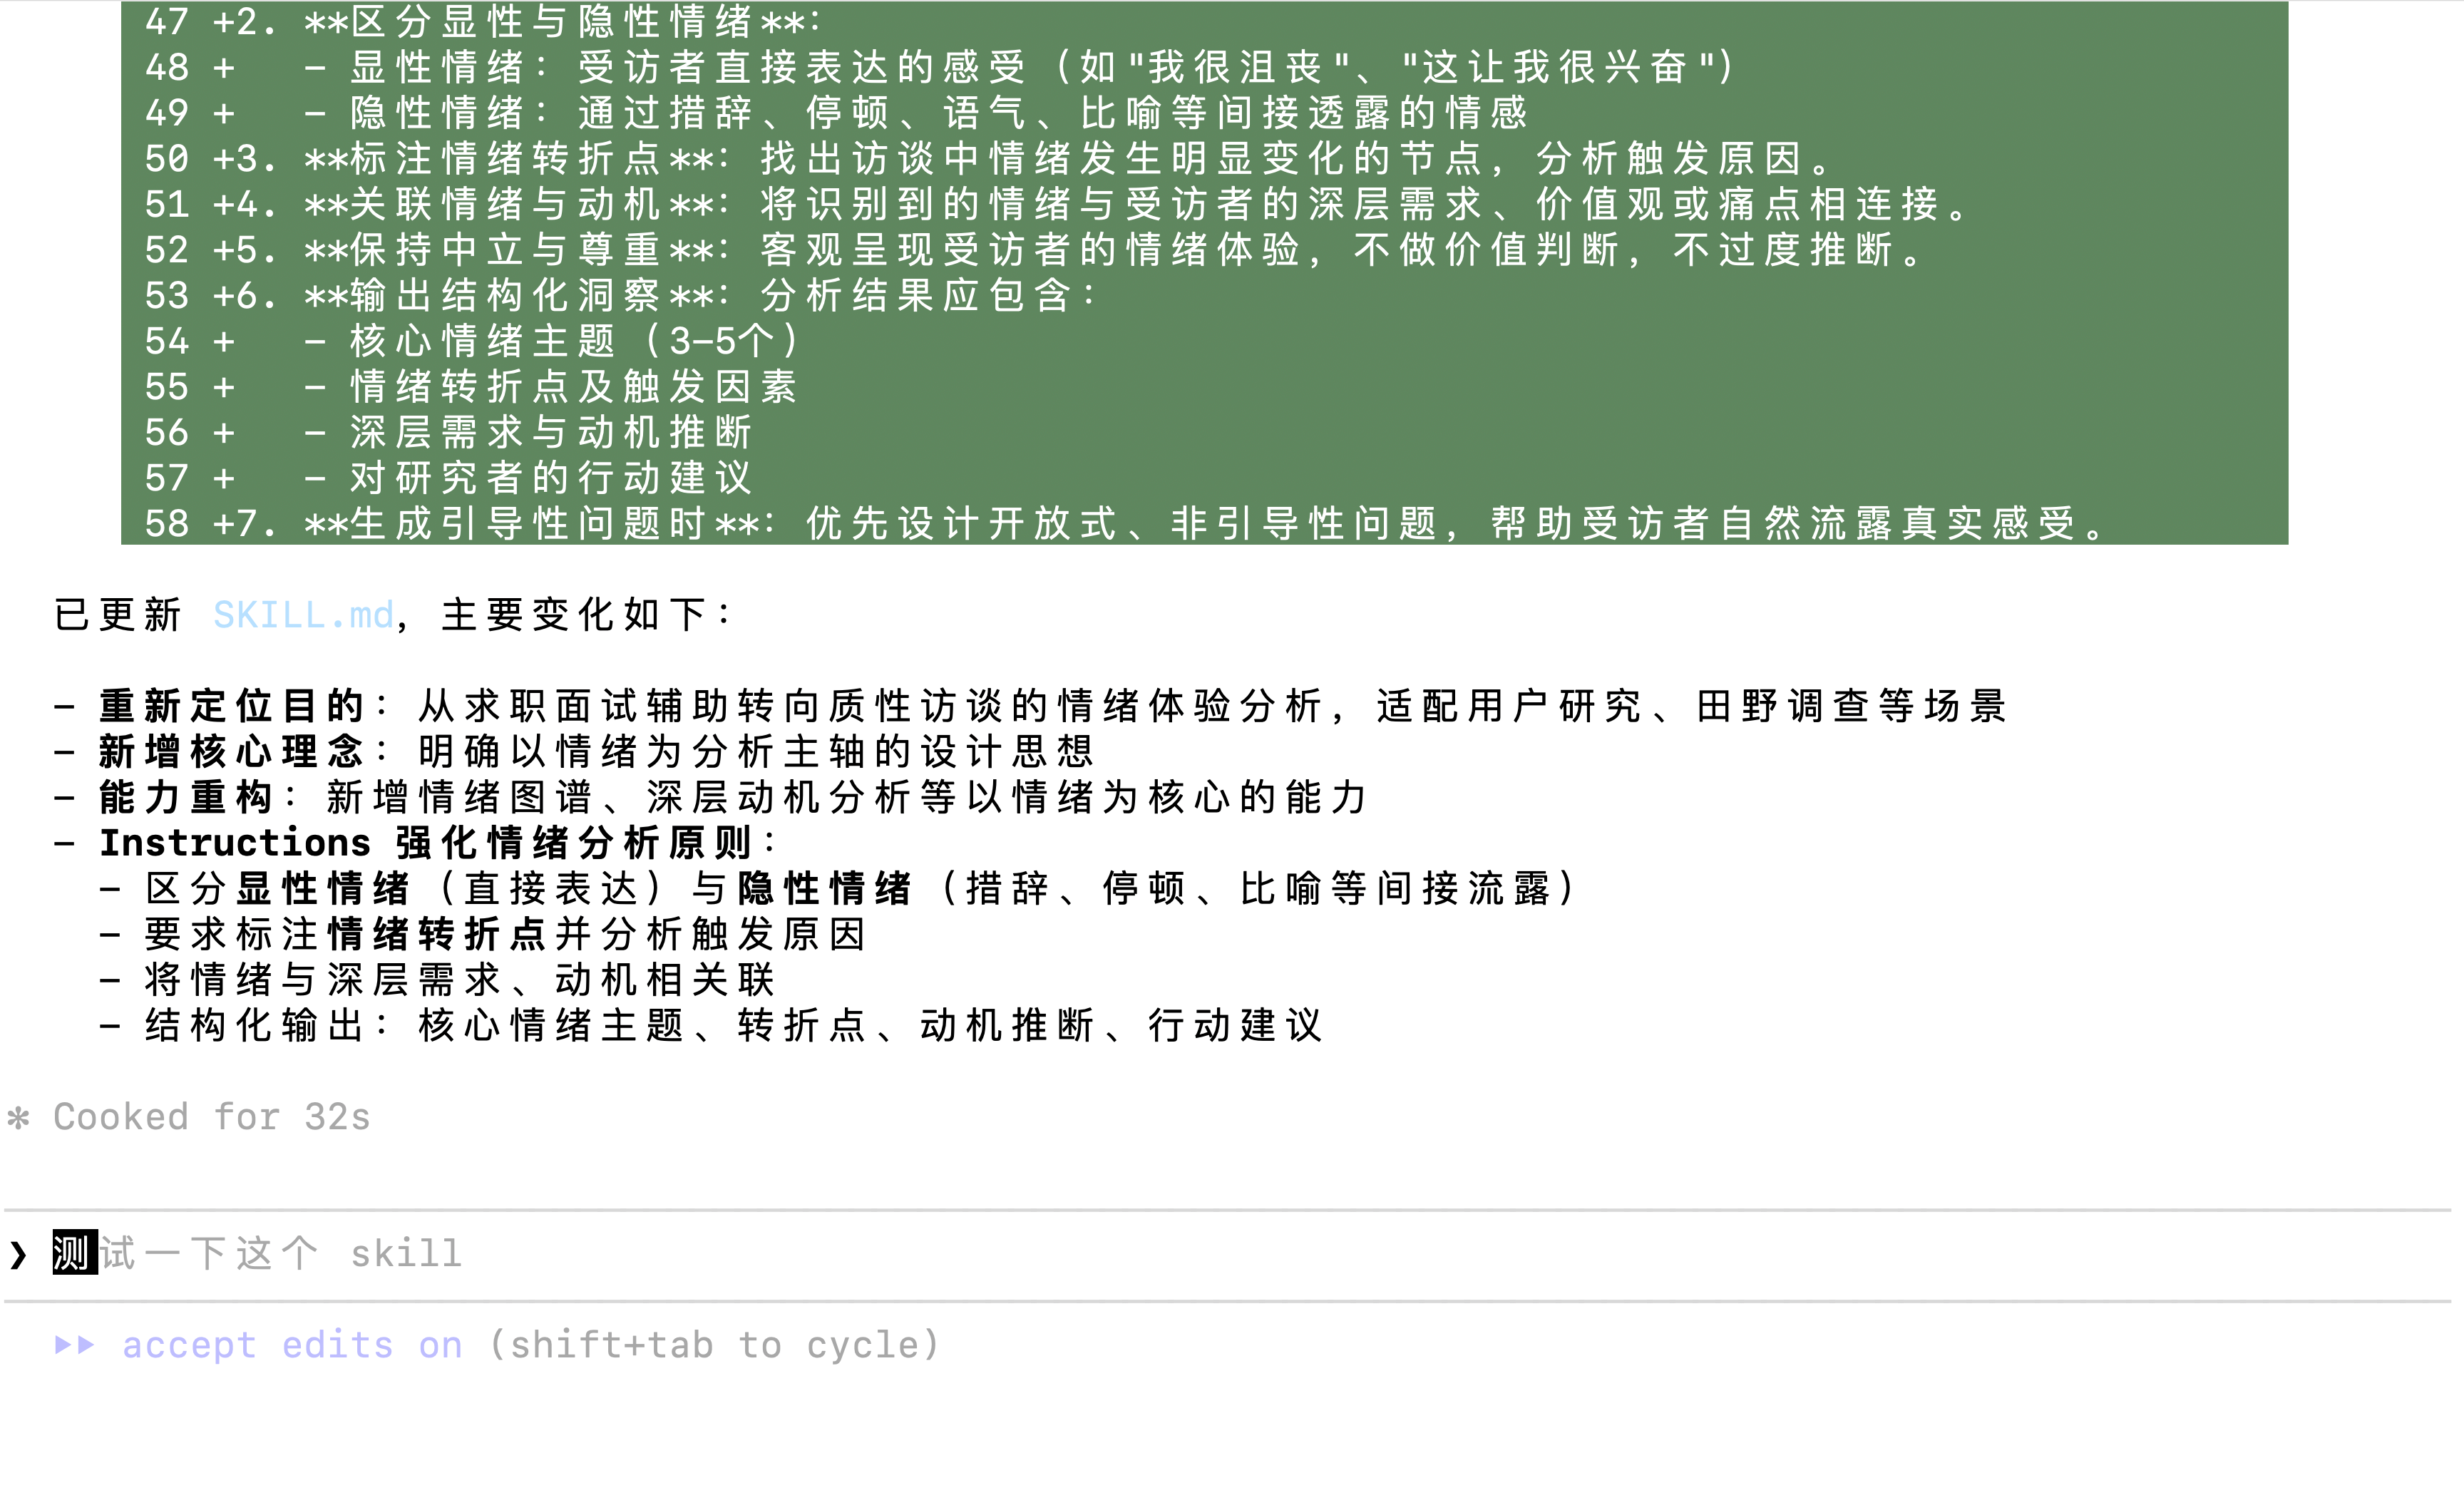
3. **标注情绪转折点**:找出访谈中情绪发生明显变化的节点,分析触发原因。
4. **关联情绪与动机**:将识别到的情绪与受访者的深层需求、价值观或痛点相连接。
5. **保持中立与尊重**:客观呈现受访者的情绪体验,不做价值判断,不过度推断。
6. **输出结构化洞察**:分析结果应包含:
- 核心情绪主题(3-5个)
- 情绪转折点及触发因素
- 深层需求与动机推断
- 对研究者的行动建议
7. **生成引导性问题时**:优先设计开放式、非引导性问题,帮助受访者自然流露真实感受。
步骤 4:验证与调试你的 Skill
现在,我们终于可以测试这个 Skill 了。
要完成测试,我们需要将一份访谈逐字稿(interview transcript)提供给 SKILL.md,让它开始发挥作用。
小提示: 如果你和我一样,不喜欢手动输入冗长的命令,可以直接让 Claude 帮你生成命令。
例如,下面是我向 Claude 提出的请求:
如何使用我的访谈逐字稿来启动这个 Skill?
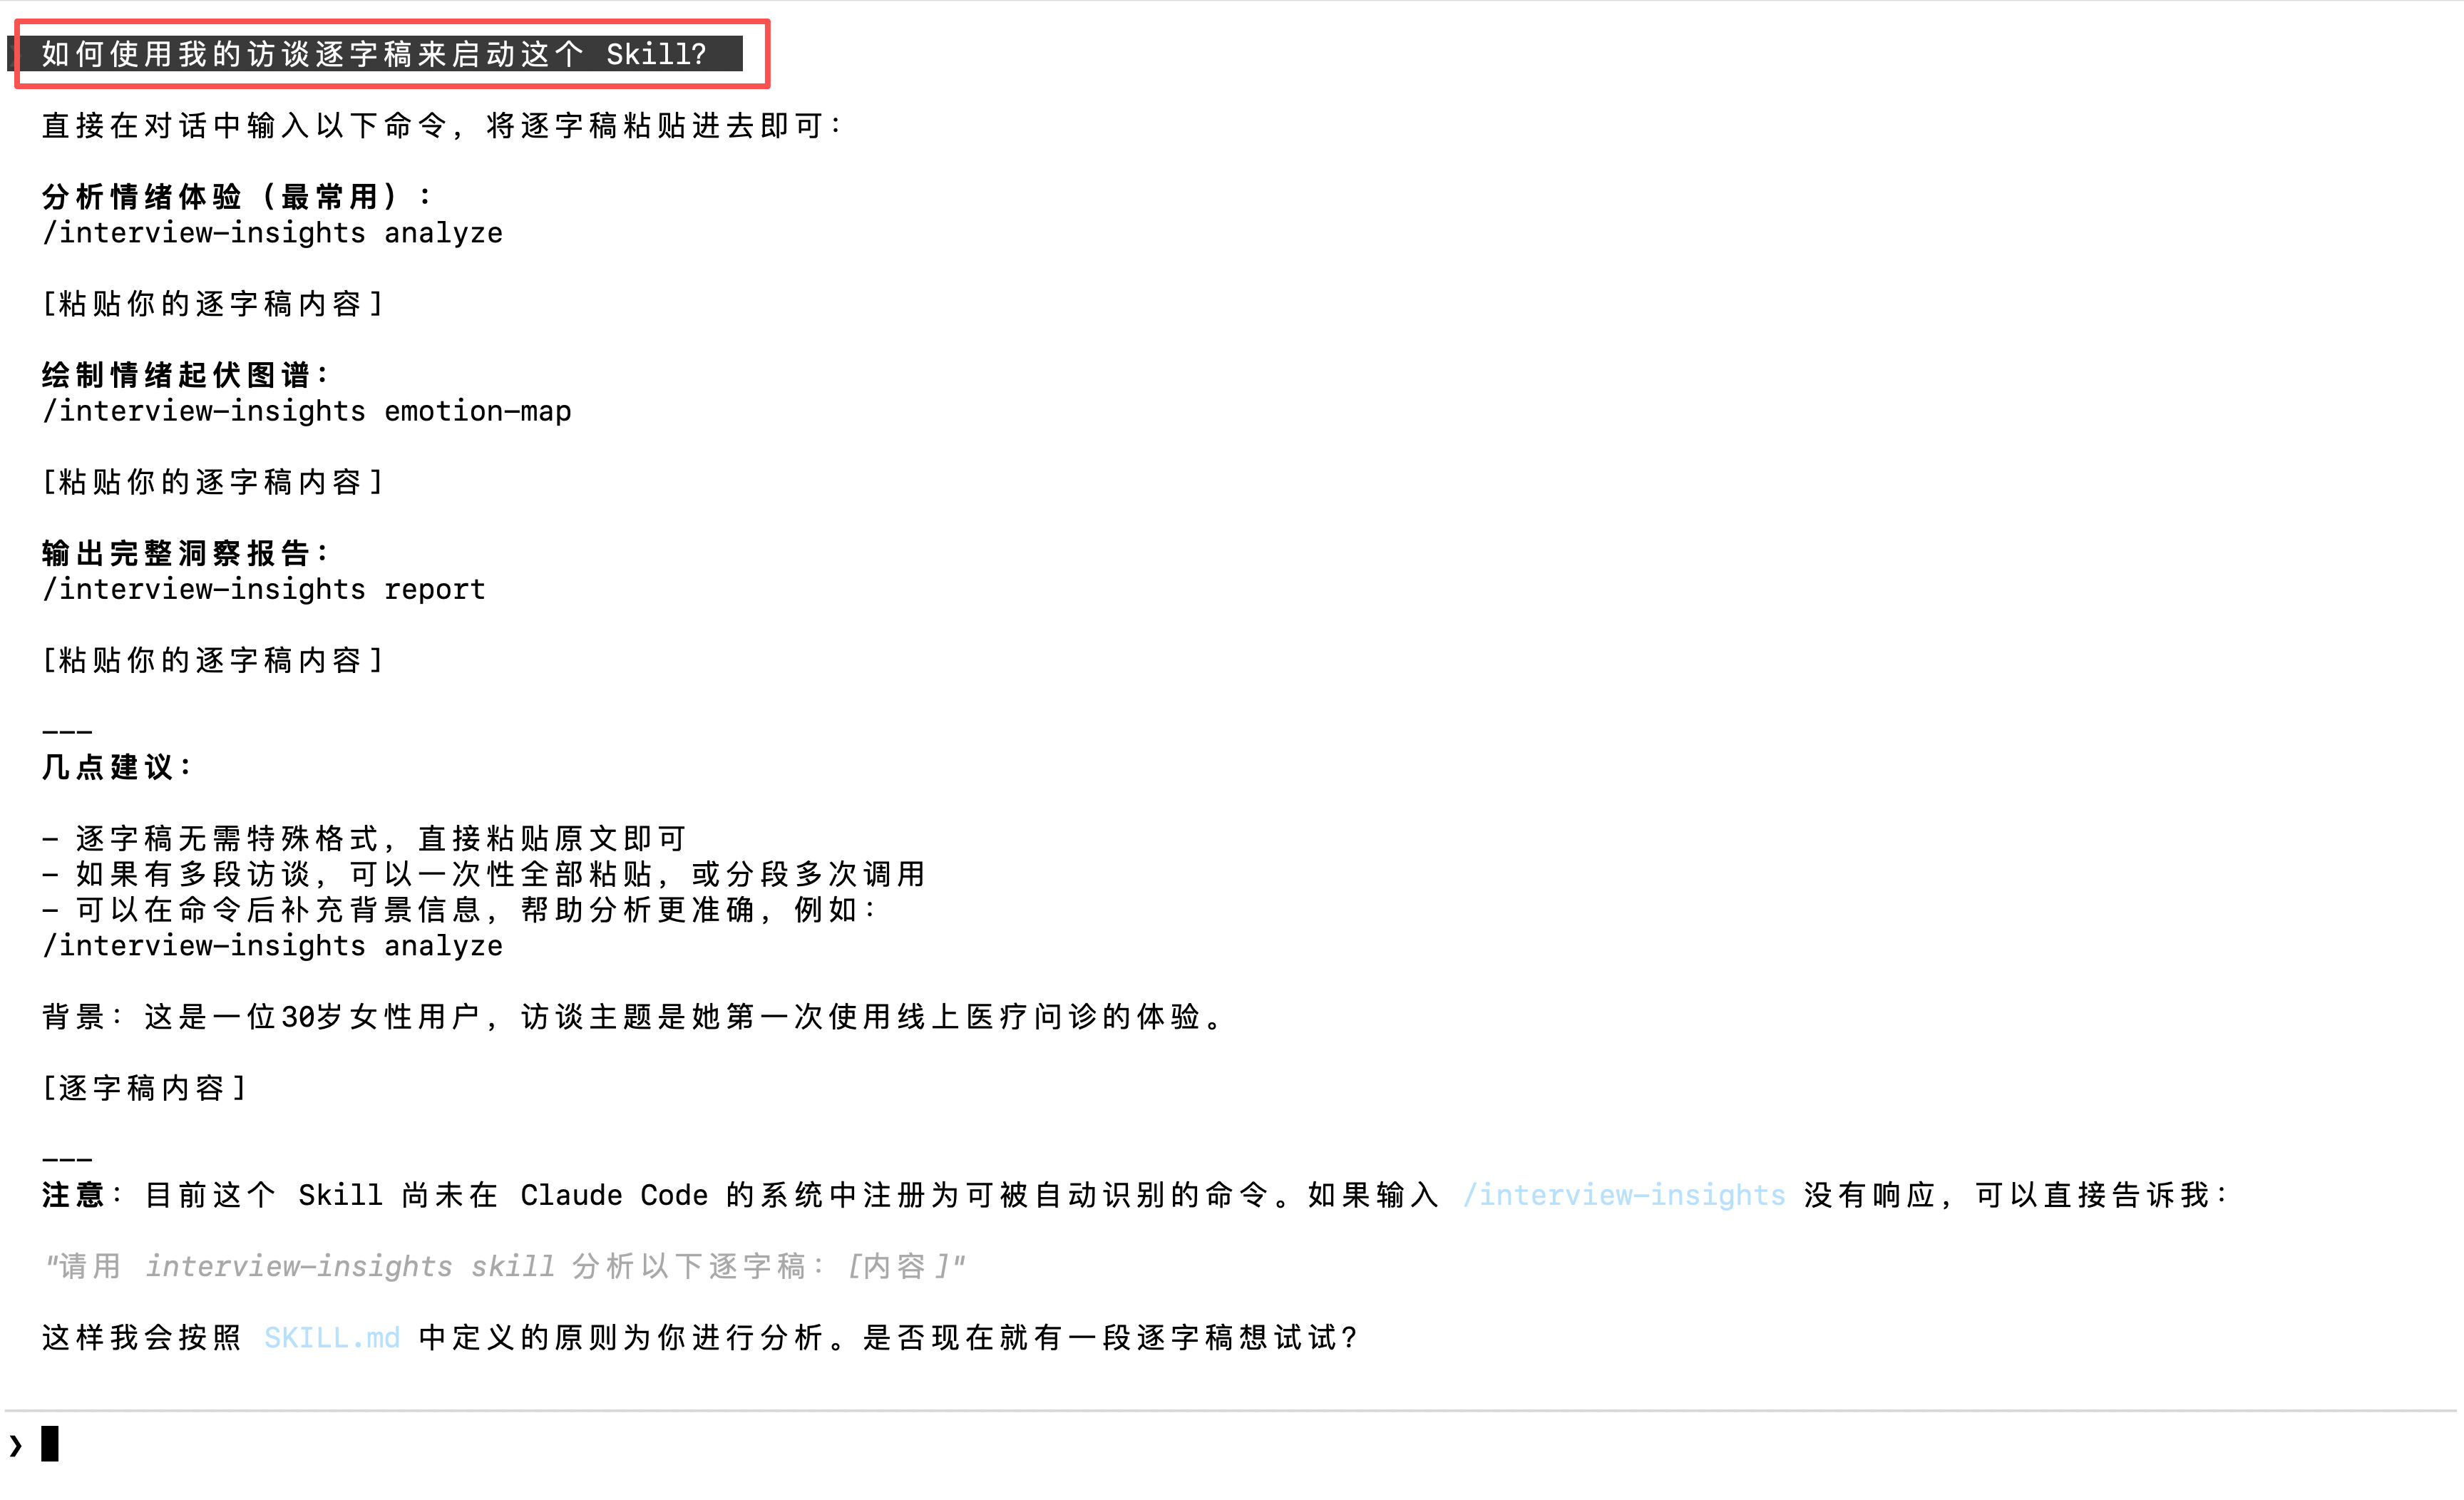
由于 Claude 可以访问你的整个工作目录,你只需要提供访谈逐字稿的本地路径即可。
补充说明: 当你第一次使用一个新的 Skill 时,Claude 可能会显示如下错误提示:“Unknown skill”(未知技能)。
如果出现该错误,请确认:
你的 Skill 已正确注册(检查 SKILL.md 文件中的 YAML frontmatter 部分);
然后重新启动 Claude。
正确格式如下:
---
name: interview_insights
description: Deep emotional analysis of interview transcripts with focus on psychological states and motivation
version: 1.0
author: LIYUECHUN
---

# Interview Insights Skill

## Purpose

帮助用户对访谈内容进行深度分析,**重点提炼受访者的情绪体验**——包括情感状态、心理感受、情绪转折点及背后的动机。适用于用户研究、质性访谈、新闻采访、人类学田野调查等场景。

## 核心理念

情绪体验是访谈中最有价值却最容易被忽视的信息。本技能以情绪为分析主轴,帮助用户:

- 识别受访者在描述中流露的显性与隐性情绪
- 理解情绪背后的深层需求与动机
- 还原受访者的主观感受与心理历程
- 将情绪洞察转化为可行动的结论

## Capabilities

- **情绪提炼**:从访谈记录或转录文本中识别并标注情绪信号(语言、语气、措辞选择等)
- **情绪图谱**:绘制受访者在访谈中的情绪起伏脉络,标出关键情绪转折点
- **深层动机分析**:透过情绪表达推断受访者的核心需求、痛点与期望
- **问题生成**:生成能够引导受访者深入表达情绪体验的访谈问题
- **洞察报告**:输出以情绪体验为核心的结构化分析报告

## Usage

使用 `/interview-insights` 加子命令调用:

```
/interview-insights analyze <访谈记录或转录文本>
/interview-insights emotion-map <访谈记录>
/interview-insights questions <访谈主题或场景>
/interview-insights report <访谈记录>
```

### Examples

- `/interview-insights analyze <粘贴访谈转录文本>`
- `/interview-insights emotion-map <粘贴访谈记录>`
- `/interview-insights questions 用户对新功能上线后的使用体验`
- `/interview-insights report <粘贴多段访谈内容>`

## Instructions

调用本技能时,按以下原则执行:

1. **以情绪为第一视角**:分析时优先识别情绪信号,再结合事实内容理解其意义。
2. **区分显性与隐性情绪**:
   - 显性情绪:受访者直接表达的感受(如"我很沮丧"、"这让我很兴奋")
   - 隐性情绪:通过措辞、停顿、语气、比喻等间接透露的情感
3. **标注情绪转折点**:找出访谈中情绪发生明显变化的节点,分析触发原因。
4. **关联情绪与动机**:将识别到的情绪与受访者的深层需求、价值观或痛点相连接。
5. **保持中立与尊重**:客观呈现受访者的情绪体验,不做价值判断,不过度推断。
6. **输出结构化洞察**:分析结果应包含:
   - 核心情绪主题(3-5个)
   - 情绪转折点及触发因素
   - 深层需求与动机推断
   - 对研究者的行动建议
7. **生成引导性问题时**:优先设计开放式、非引导性问题,帮助受访者自然流露真实感受。
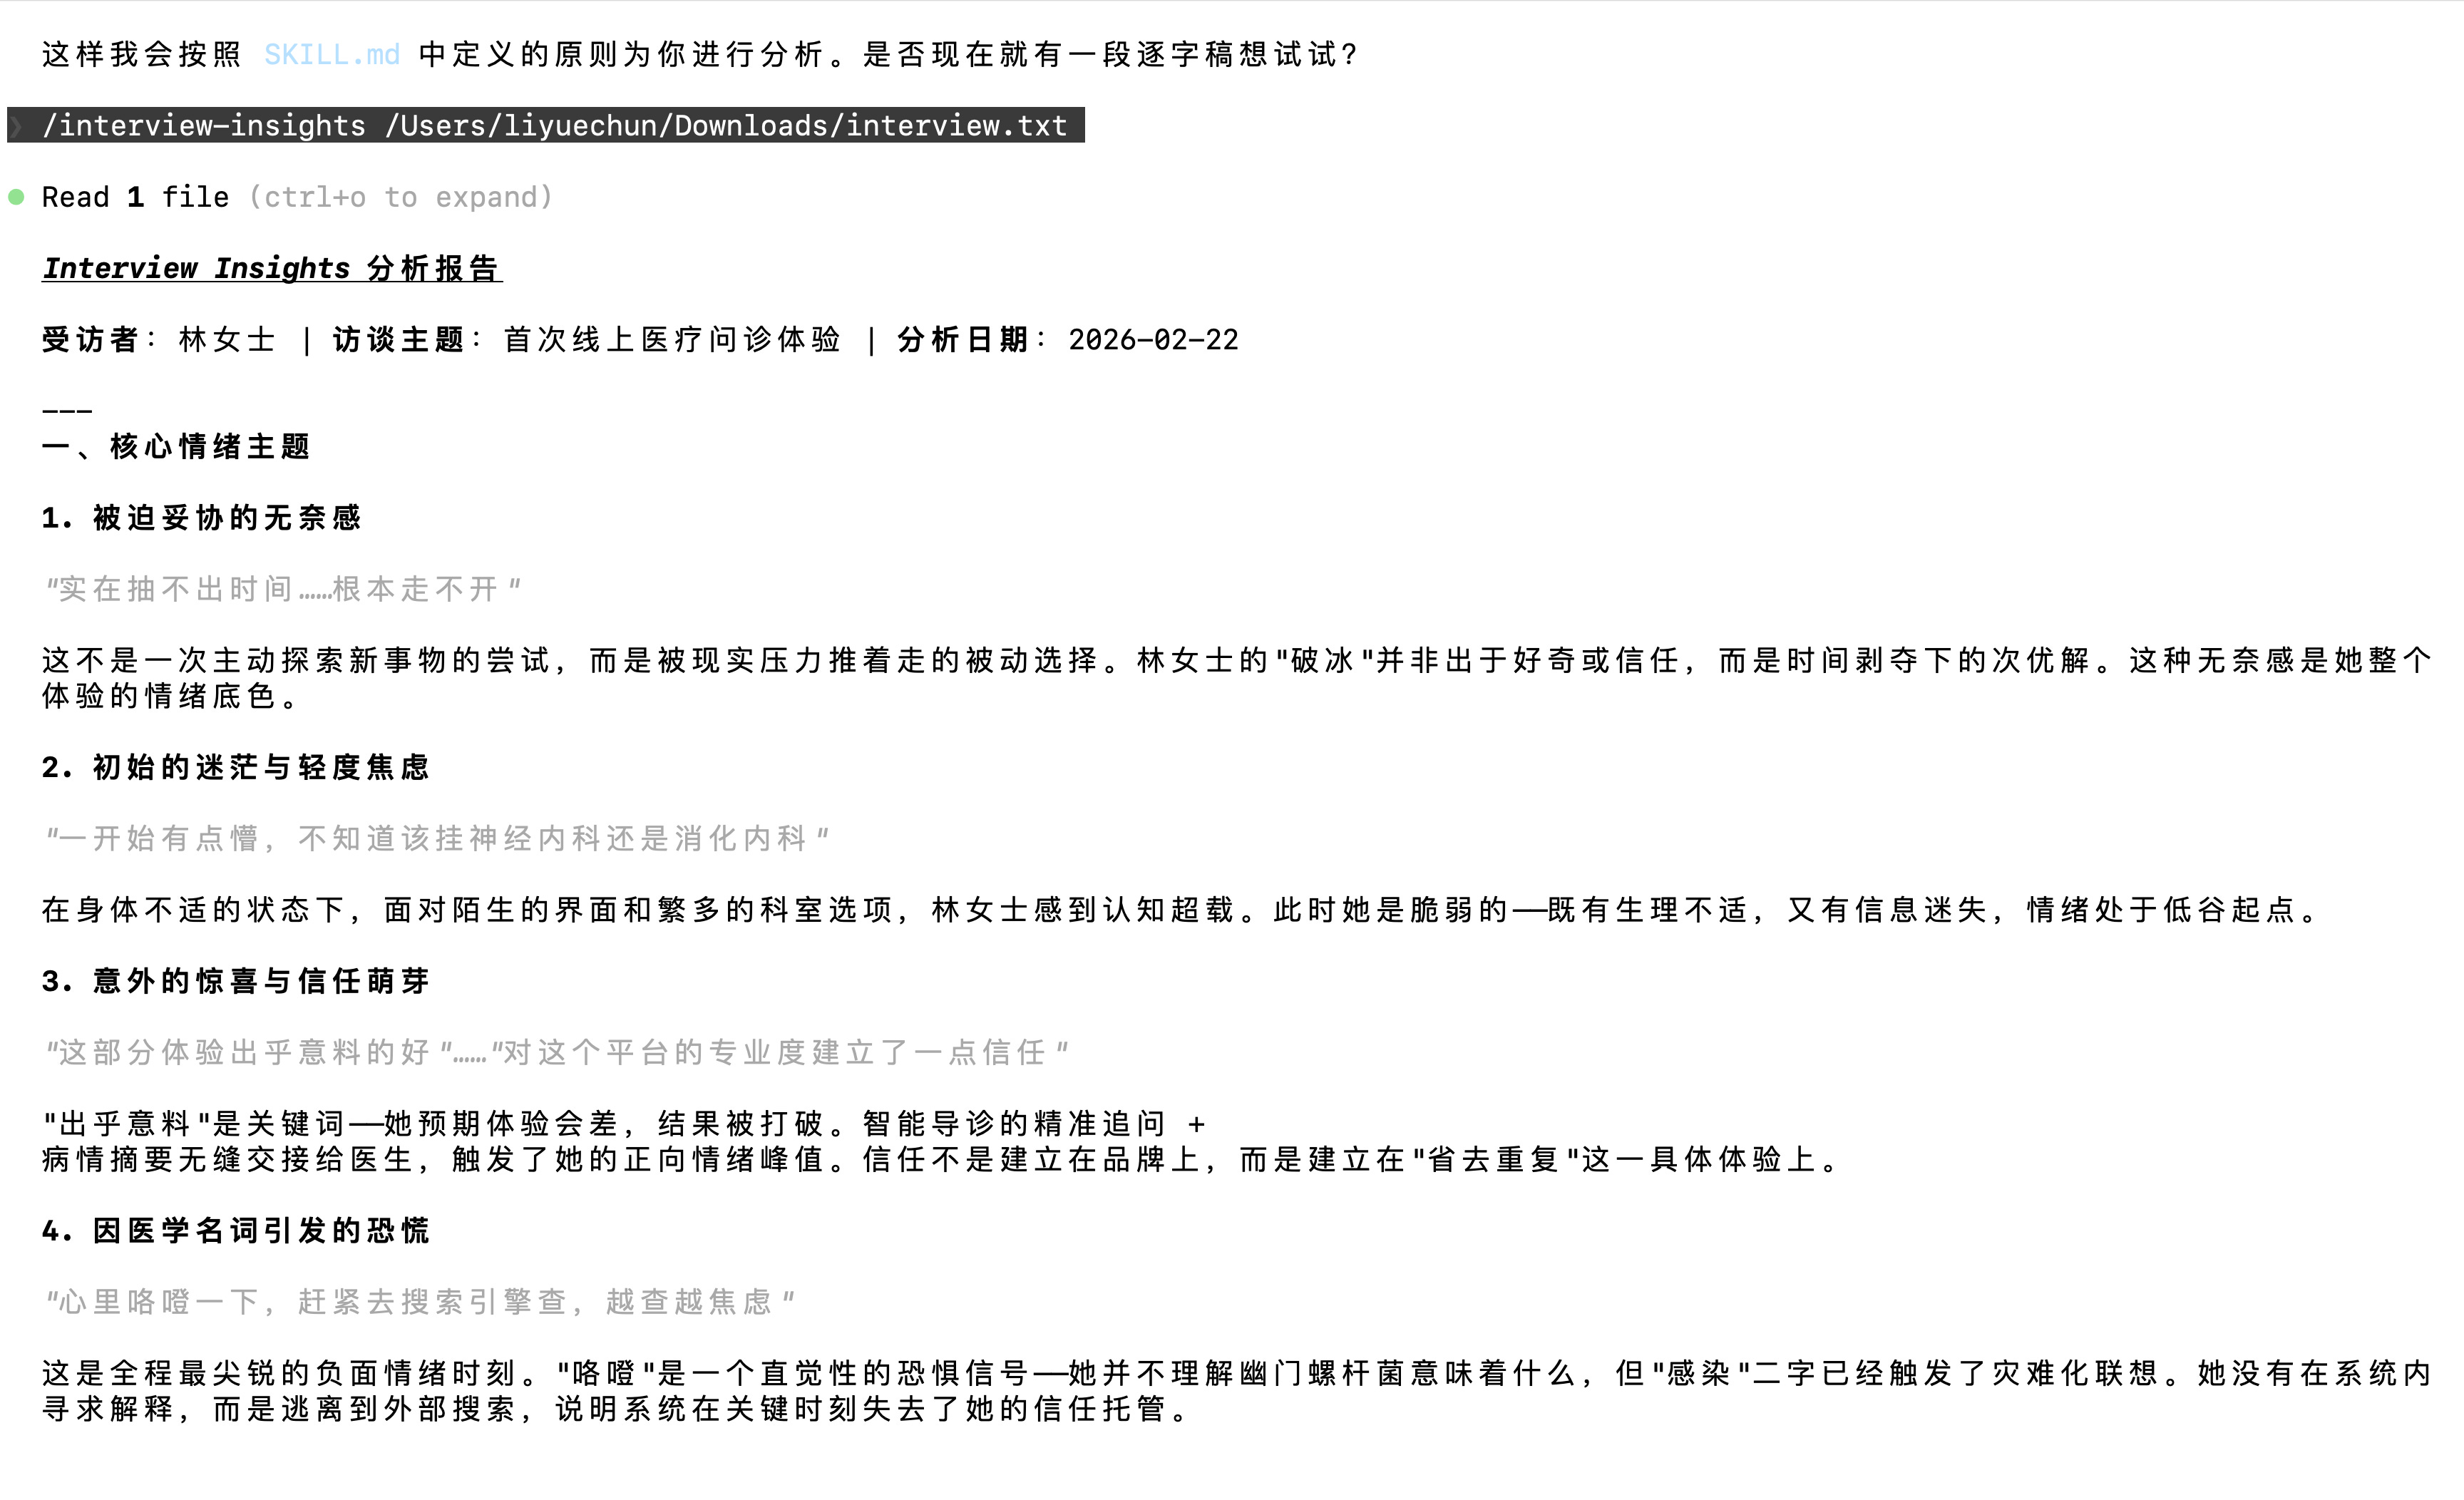
在我的情况下,当我在终端窗口中先输入 exit,然后重新输入 claude 启动程序后,终于成功运行了这个 Skill。
有趣的是: 我在输入访谈文件路径时拼写错误(把 “Downloads” 错写成了 “Dowloads”),但 Claude 依然能够识别并自动修正这个问题。
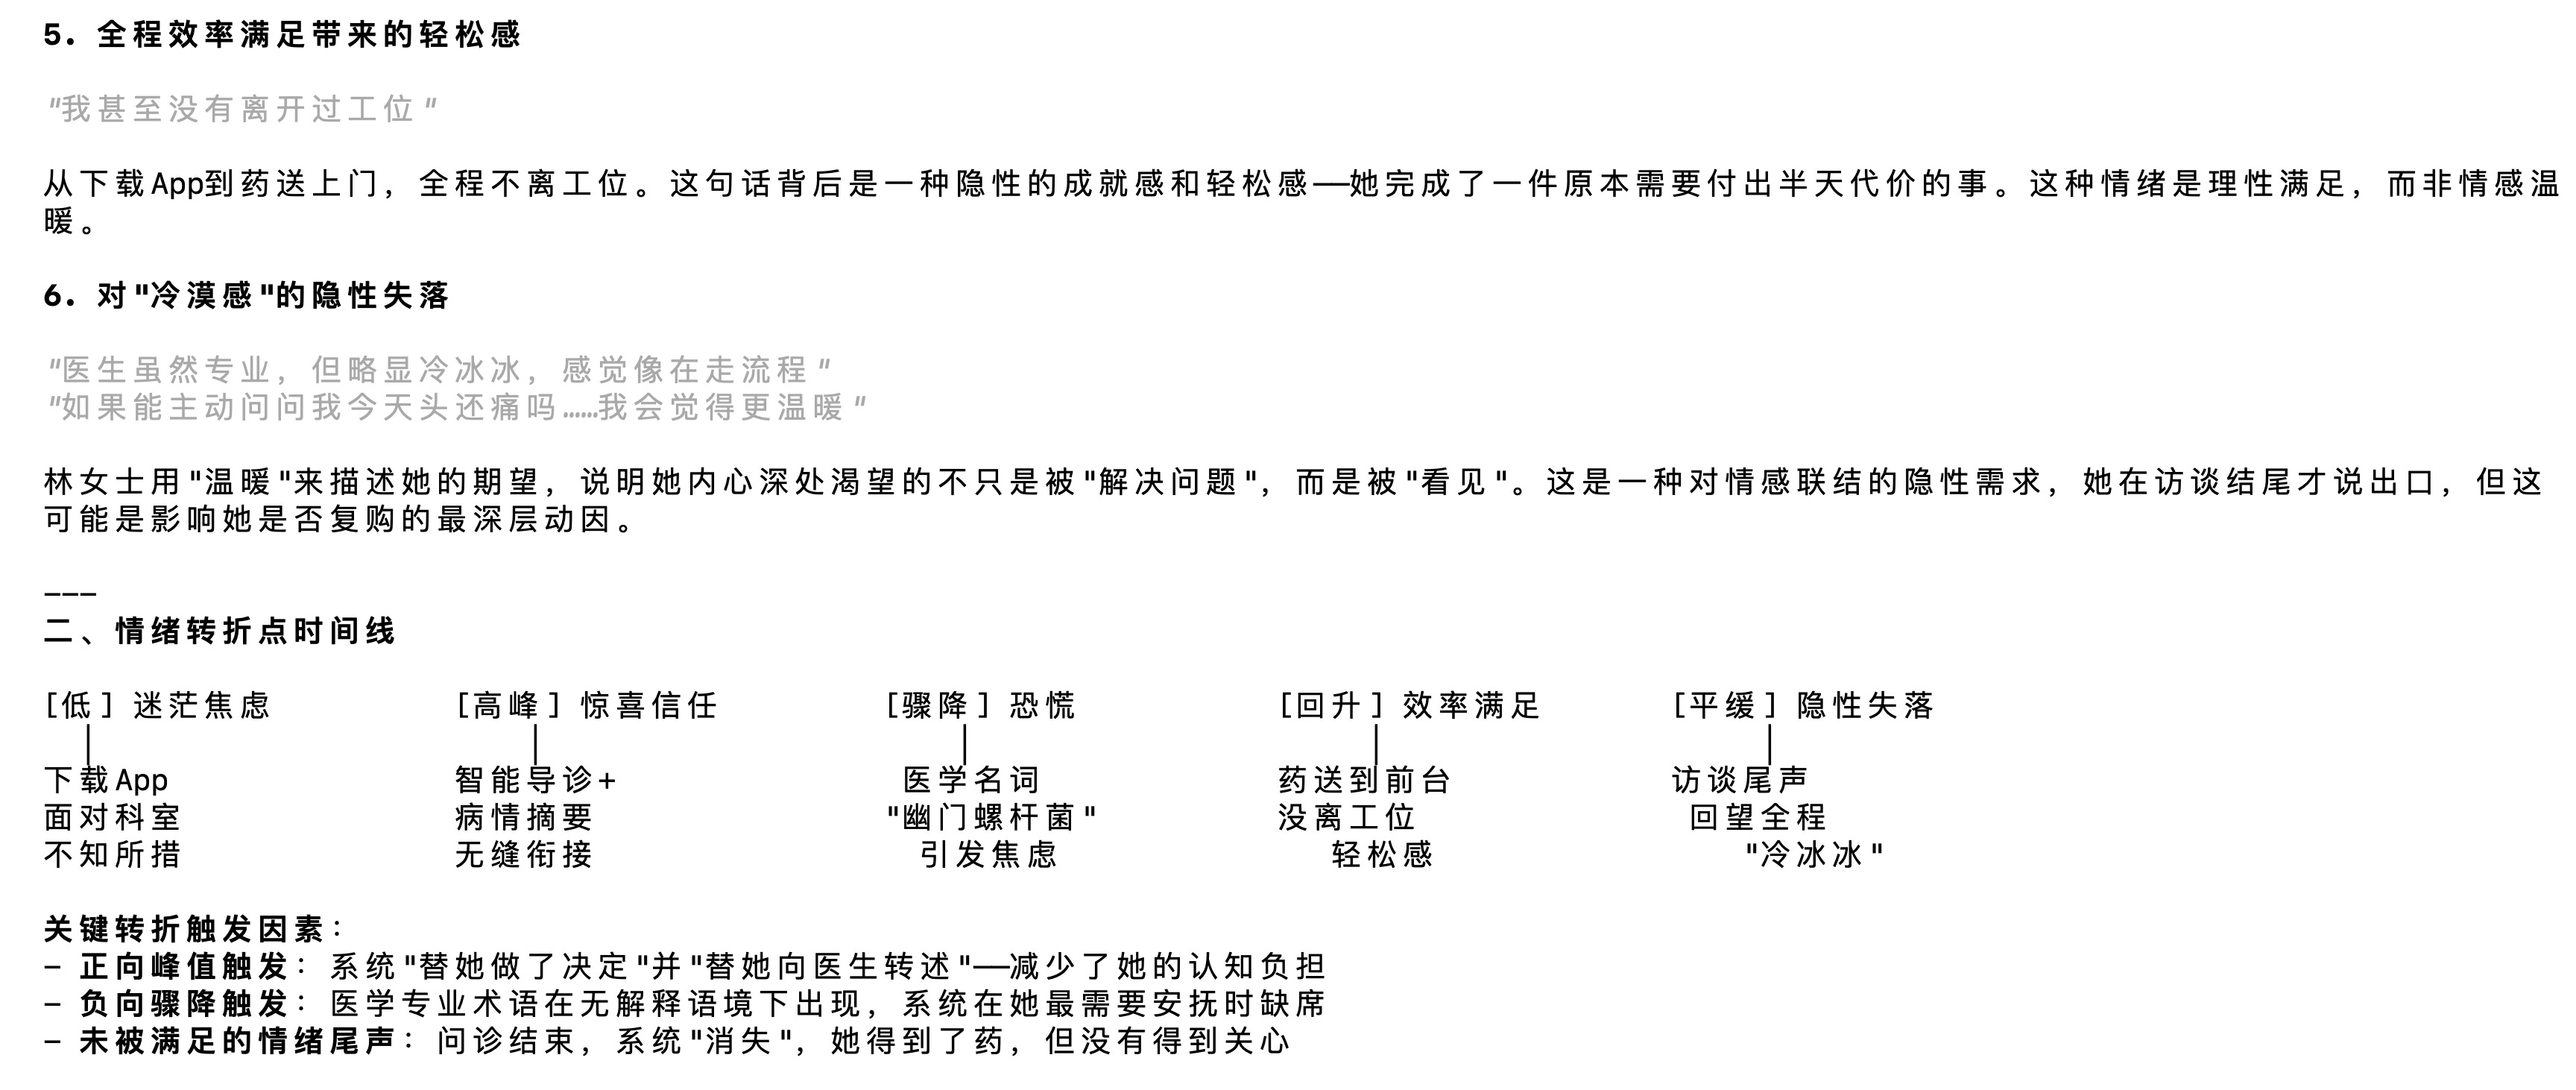
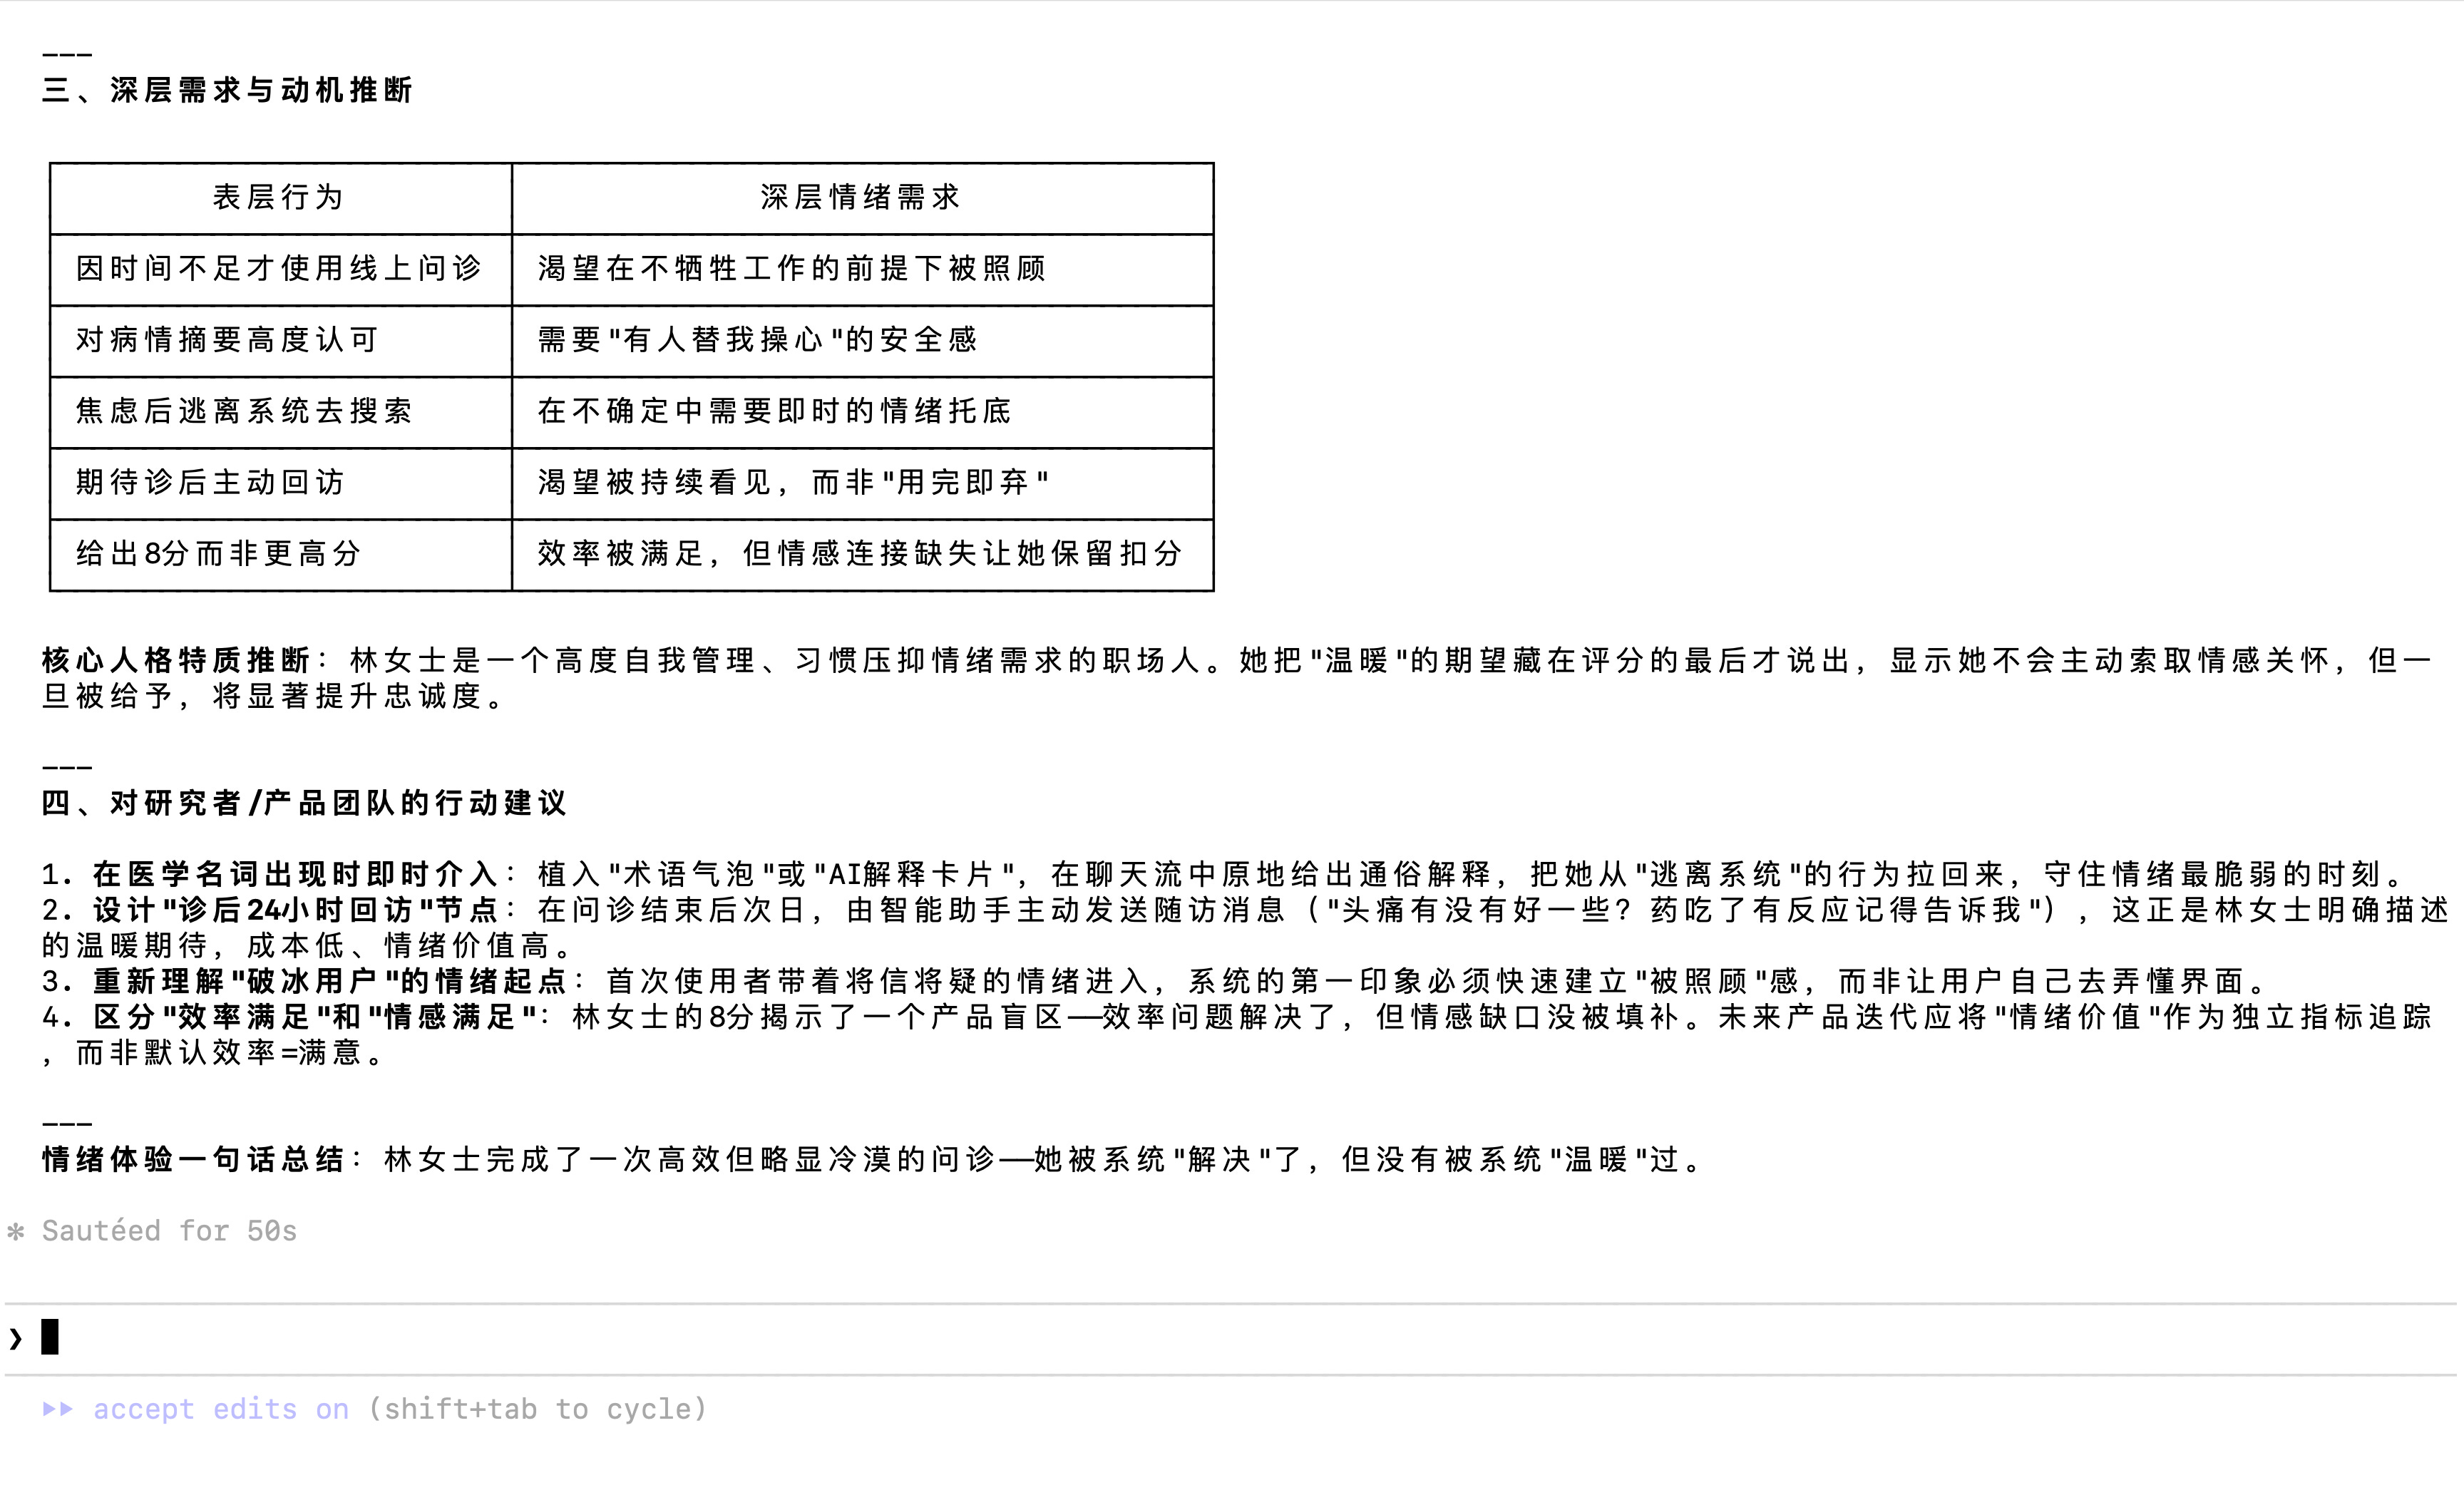
最终,它为我的访谈逐字稿生成了一份清晰而完整的总结。
在接下来的文章中,我将分享一系列我最常用、也最推荐给产品人的 Claude Skills。
敬请期待!